how to Archives - WizMojo

Convert Text-to-Speech Easily and Swiftly in Multiple Accents and Languages


Content Creators have taken the world by storm in the past few years. Every single day, content creators from all over the world are coming up with their latest and unique ideas, and the race to post their content first on the internet is also quite interesting. The winners of this race are intriguingly those who have upgraded their game by taking the help of the latest software, which assists in reducing hours of work and put out the content in the best manner and a short period.

Convert Text-to-Speech Easily and Swiftly in Multiple Accents and Languages

In the world of Web and Content Creators, a crucial shift in the text to speech technology has occurred, of which you can also take advantage of your content needs. Here we are primarily focused on the capability to create items such as the presentations, podcasts, explanatory videos, marketing videos and more, with the speed of light.

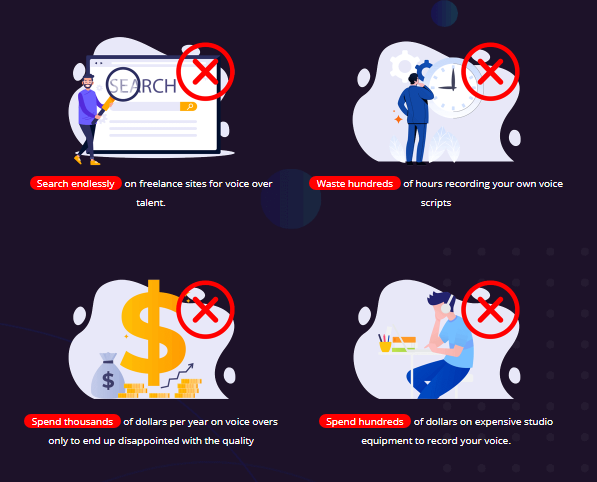
Have you ever thought if you could make twenty times more videos in the same amount of time that it would take to create a single video? How awesome would it be? Or you must have gone through the times when you would urgently require a voiceover for your video. In those circumstances you would most likely have to pay hundreds of dollars on freelancing sites like:

  1. Fiverr
  2. Upwork
  3. Freelancer
  4. SEO Clerks etc.

Even then, you would not get your content in time, and there would be a myriad of other things that would go on, causing a headache and work-failure.

Interestingly, one of the most well-known technology among video creators is the text-to-speech mechanism. You don’t have to pay a freelancer for that, as you only have to type your text and click a button to convert it into speech. It sounds like a fairytale, right? But, that’s not it. It also comes up with a huge drawback, that is, the voice quality. No one (a sane person) on Earth likes to hear a robotic voiceover with no emotions.

How do you get rid of it? Applications such as Google Assistant, Amazon Alexa jumps in this scenario as they offer very realistic voice-overs. Have you ever wondered what makes them so different and pragmatic and NOT robotic at all?


Convert Text-to-Speech Easily and Swiftly in Multiple Accents and Languages

The technology behind these masterpieces known as the Google Wavenet and Amazon Polly respectively hold the answer to that. However, again there comes a problem. You would need to attempt to code your solution or buy it from the internet. And even then, digital platforms don’t have everything you need to quickly and easily produce great sounding voice-overs.

Keeping all of the mentioned things in mind, we need to have something that would give us the combined benefits of both Google Wavenet and Amazon Polly.

VoiceBuddy is such a software that every Content Creator has eyes on, that combines Google Wavenet and Amazon Polly under one platform. It is a unique cloud-based, text to speech software fulfilling all the needs of every Content Creator as it offers tons of additional features as well.

How does it work?

Working with VoiceBuddy is extremely simple, as you solely have to copy/paste your text. Next, click a button, then leave the rest to this magnificent software as it would give you an extremely natural sounding voice-over.

Convert Text-to-Speech Easily and Swiftly in Multiple Accents and Languages

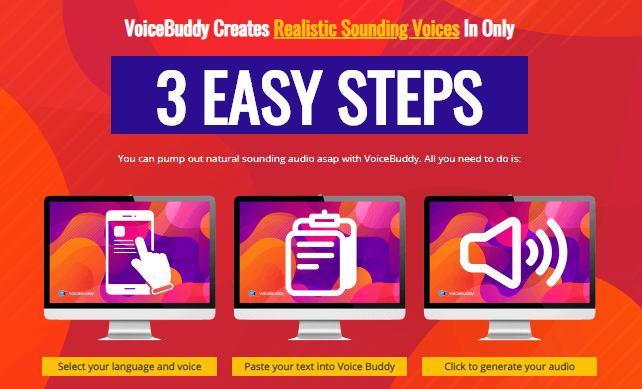
To work with this software, you need to follow the following three easy steps:

  • Choose your voice and language from the available options
  • Paste your copied text
  • Click the button to generate your voiceover

VoiceBuddy offers thirty-three different languages and 141 voice options. It is straightforward to use; any new user can easily access it without any hurdles at all. Not just it gives you quick and realistic voice-overs, it also gives you access to change the pitch, speed, pause etc. of the voice-over.

Traits and Advantage of this Software:

In this section, we are going to discuss the advantages and features of this software.

Convert Text-to-Speech Easily and Swiftly in Multiple Accents and Languages


1) Multiple Languages

Nowadays, content is diverse in voice and languages. This software ensures this need as it offers thirty-three different languages. You can easily pick your desired language from the available languages such as Hindi, French, Spanish, Chinese, etc.


2) Multiple Voices

Different accents and vocal styles are always a charm in a text to speech software. It combines Google Wavenet and Amazon Polly; which is why it gives you the privilege to go on and try different accents and vocal styles suitable for your needs.

3) User-Friendly

With a forward user-friendly architecture and look; even an ordinary person can get his hands on this software. You don’t have to be a technology geek to understand this, as all the instructions are crystal clear and text-to-speech conversion is away from you in just three simple steps mentioned in the earlier part of this article.

4) Text to Speech Editor 

You can also edit all your text that you have copy/pasted in VoiceBuddy. The vast layout ensures that you can easily edit your text. Additionally, you can also set and change different features such as the emphasis on words, the pitch of your audio, speed of the speech, etc. You can also add breaks at points to make the sound of your voice-over more natural and can also set paragraph and sentence breaks. It also provides you with the option to add notes to each audio file.

5) A Cloud-Based application

One of the best features of this software is that it does not require you to install or download anything. The entire work is completed online; it works on every single device whether Android, iOS, Windows, Mac or any other operating system. All of your data is saved on the cloud and is secure. You only have to log in to your website from any device and do your work as directed.

6) Export your Voice-overs

Another attractive feature of this software is that it lets you download the audio in mp3 format. That makes it handy, right? You can easily export your voice-overs and use them later on applications like Camtasia, Audacity, etc. Moreover, you can send them directly as mp3 files, which eliminates the complexities of working with other traditional text to speech software.

Convert Text-to-Speech Easily and Swiftly in Multiple Accents and Languages

Conclusion:

You need to have access to the best tools available online if you want to produce the best and unique content. You probably have spent a lot of money on software and schemes that assured you payback, but only fooled you and did not deliver what they promised. This software has been positively rated so far by all its customers and offers numerous benefits. VoiceBuddy helps you in reducing your workload by delivering the most natural human-like voices and is an extremely efficient tool. Time is money, so you will only be doing yourself a favour by getting this software as it will not only fulfil your needs but also save you tons of time. You can get this software on its official website and get it at a discounted price. If you are looking forward to buying then do it as soon as possible as the rates of this software are going up day by day. So do yourself a favour and get this software ASAP.

Tagged : / / / / / / / / / / / / / /

How to Find and Make the Most of High Authority Expired Domains?

Bringing an influx of traffic on your website is pretty challenging for an online marketer. Last week, I was struggling to increase visitors on my newly made website, but since I had a lot of other things to manage, I couldn’t do it. By discussing the issue with one my fellows, I got to know about the High Authority Expired Domains.

High Authority Expired Domains

The idea of expired domain marketing is thrilling for a marketer, but it’s a challenge to explain it to a layman. For most of the people, web addresses are immutable, but the reality is, they come and go every day. You can use high authority expired domains for multiple purposes I am going to tell you shortly. Now, the question is how can you find such domains among a million other addresses? That’s what I am here for in this post to let you know how can you find and then buy the expired domains.

What Can You Use Expired Domains For?

Before moving on to the way of finding, using, and buying an expired domain, you should know what you can use them for. Well, you have got three options.

1) Redirect Traffic of the Domain to Your Own Site

If you have found a relevant domain with a good number of visitors, you can steal that traffic and bring it to your own website. Once you have siphoned off visitors, you can eventually let the domain expire again when the traffic is minimal.

2) Start a Microsite, PBN or a Full Website From Scratch

On the domain you have chosen, you can start a new website. It is fruitful when you want to start a blog or a business that matches the niche of the expired address you have found out. The results are best when you can do better than the previously existed owner. It’s just like starting a website from scratch with an additional benefit of already developed monthly traffic that you don’t get otherwise.

3) Restore the Old Website

Won’t there be a reason why there are a lot of visitors on the expired domain? This shows it was a successfully running website. You can try to restore it and make it look like the older one with the use of tools like Google cache. Don’t get disheartened if you don’t get everything back because it isn’t that simple, but you can try.

How To Find Expired Domains?

Online marketers know that things change pretty often and websites can vanish anytime, but this is not a common societal perception. Imagine getting your hands on a website that already has a handful of traffic! The biggest challenge of an online marketer is to build traffic on a website, and when you can get it all readily available on your plate, it feels like a blessing.

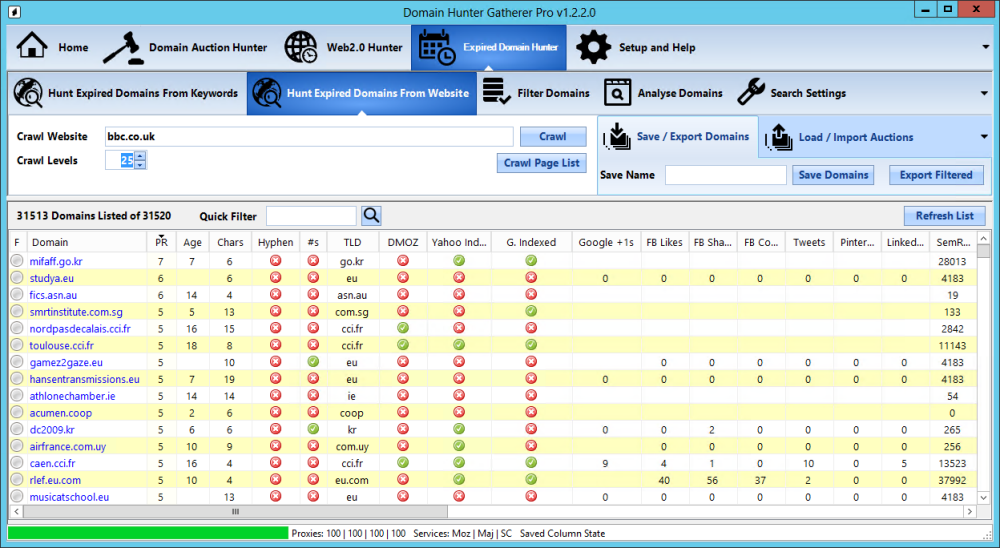
With expired domains, I mean the addresses that are expected to disappear soon. They are different from the ones that have not been registered yet because they have got a history, and those addresses that have got a good past are demanding. Domain Hunter Gatherer is the tool that will help you find the web addresses that will soon vanish out, along with the history they hold. You can see and then buy the one that suits you the most.

There are some obvious reasons why I am suggesting you use Domain Hunter Gatherer. Following are some of the key reasons I have listed down. Have a look!

1) There’s No Need of a Third Party Service

You have got an all-in-one solution with no additional cost. The software finds you metrics out of Majestic and co. without any extra fee; thereby saving you a handsome amount of money.

2) There are Five Ways Through Which You Can Find Web Addresses

This software allows you five simple options of searching an address. Let’s talk about each, individually.

Search From Websites: You will have to slide into some of the popular websites and find their linked addresses that have been expired. For instance, you can search for high authority expired domains domains from wikihow, CNN’s official website, etc.

Search Through Keywords: Online marketing is nothing without keywords hunting, and the same applies when you find domain addresses through domain hunter. Enter some keywords of your interest and the software will find you some related expired addresses.

Backward Hunting: You can also look for the backlinks of the domain you have entered. When you enter a domain address, the software finds you the backlinks and then scans them to find soon-to-be-vanished domains.

Auction Hunter: The software also allows you to look up eight marketplaces that have been expired and the key metrics associated with them when you enter a domain. It works just like an auction.

Web 2.0 Hunter: You can also search for related expired 2.0 web platforms from twenty varying 2.0 platforms.

3) Filtration and Sorting

You can filter out the domains either demographically by choosing language and countries or by the number of traffic on websites. It eases and fastens the process of searching as per your needs and goals.

4) Rebuilding a Website

Once you have selected an expired domain, you must need a lot of changes to meet your standards, right? To put it simply, you need to recreate or rebuild the entire website. The domain hunter gather allows you to rebuild your chosen address in just one click.

What Packages Does the Software Offer?

It has three different packages and each suits different needs. The packages are named as free, premium, and professional.

As the name indicates, the first package is free of cost with ad-supported domain auction hunting. Other distinguishing features include the ability to compare domains from all auction sites, more than thirty-five quality metrics, and video guides.

The premium package costs $17/month with expired web 2.0 hunting. Furthermore, it allows you to register unlimited accounts at no cost, search through keywords, access all features from the free version, and the thirty-day money back guarantee. What is more, the package is multi threaded for speed so efficiency is also apparent.

The professional package has got everything along with the high authority expired domains mining in $87/month. With this package, you can access a good aged domain starting from $10 or even less, crawl authentic websites, look for expired domains related to your niche, backwardly crawl website, get a unique spam check, regularly crawl thousands of pages, access to all features of DHG premium, access to DomRecovery in $97, and thirty-day money back guarantee.

In a Nutshell

The expired domains serve as a short cut when you want to start a new website. The biggest advantage of using it that you get already existing traffic on your website and you don’t have to play SEO games to do that; thereby saving you both time and energy. The domain hunter gatherer is the best tool to find and use a high authority expired domains. The software is super-easy to use and has a bundle of attractive features.

Tagged : / / / / /

How to Automate The Most Common and Critical Tasks on Your PC

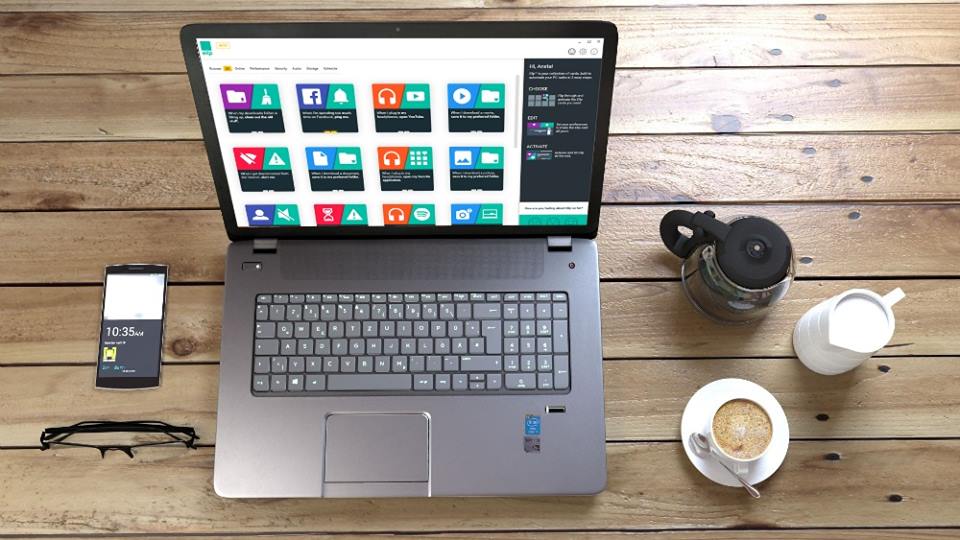
Are you a busy person who never has enough time and forgets things pretty often?  Does using PC make you irksome because you can’t manage to multitask? Ellp is free automation software that simplifies tech-use for you. I have talked about IFTTT in my previous post and this tool is just like that for a desktop. The difference is it manages actions for you on your PC rather than focusing on online interaction. However, both of the apps automate your day. Stick around to know how Ellp works and eases things for you.

How to Automate The Most Common and Critical Tasks on Your PC

How Ellp Works?

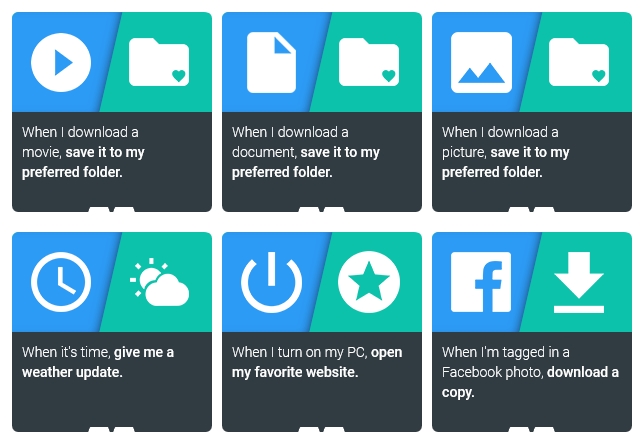
To be honest, multitasking is easier said than done. Ellp performs multiple functions that simplify PC usage for you. Basically, it is based on a “card system” and each card is assigned a certain task. Now, it’s up to you whether you want to keep all the cards activated or shut down those you don’t intend to use. You can see all the cards on the main overview and adjust the settings as per your needs. They are also stored in other places such as the Internet, Storage, Devices, and Schedule.

How Ellp Works

What Tasks Does Ellp Perform?

Now, let’s talk about each card separately.

Free Up Disk Space

The first card on the main overview says “Free Up Disk Space.” Once you have swiped and activated this card, it vacuums your system whenever it is crowded with unwanted files. By default, it is set up to 85%, which means it shows a pop-up whenever your PC’s storage reaches 85% and starts cleaning surplus. It works in the background and doesn’t irritate you with notifications and messages, other than a slight pop-up when needed.

Download Tagged Photos From Facebook

Don’t you love it when your friends tag you in memories and photos? You must want to keep them safe somewhere as a memento, right? However, most of you lack that amount of time to keep a record of such things. Let the second card of ellp activated and it will automatically download photos for you in which you are tagged in.

However, note that you have to keep logged in to your Facebook and allow the app to access your profile. Also, you have to assign a folder to the app where it would save the photos.

Block Duplicate File Download

This is the feature I admire the most! Doesn’t it happen a lot of times you keep on downloading the same file again and again upon your own ignorance? Urggghhh..!!!! This action results in clogging of your disk space and you don’t like it! The third card of ellp keeps the new one and deletes the older file automatically when you download the same file again; resulting in an unclogged disk drive.

Mute PC

Notifications and pop-up sounds are frustrating, especially when you are sleeping. Most of the time, you forget to turn off the sound and it disturbs you later. Navigate to the fourth card of ellp, activate it, and adjust the timings during which you don’t want to be disturbed by the sound of notifications, advertisements, and pop-ups.

Play Music

Some of us love to listen to the music while doing homework or writing on PC. You can flip the fifth card of ellp that says “Play Music” and select the music you want to listen. It will automatically play the selected option for you whenever you plug in any sound output like headphones or earphones. The options on the card include Netflix, YouTube, Vimeo, and others. However, keep in mind that ellp only recognizes the device through a USB port.

Open Your Favorite Website

It’s kinda ritual for most of us now to open Facebook, Twitter, Linkedin, and Google whenever we turn on our PC. If you want to save your time, adjust the settings of the sixth card of ellp and select the websites from the drop-down menu you like to visit upon turning on your system. Please, note that you can choose any website at all, apart from the ones mentioned.

Launch Skype Automatically

If you are a frequent Skype user, activate the card that reads “Launch Skype Automatically” and it will launch it for you right when you plug in the sound output. Connect with your friends right away, without wasting a minute!

Shut Down Your PC

The last card on ellp lets your PC shutdown, restart, or sleep at a certain given time. Just select from the given three options and timings as per desired and it will automatically do as it has been programmed.

That’s it! See, how your day is automated just by installing a simple app on your PC. Installing is as easy as any other software/app on your system. None of us can live without our PCs today, and something that automates it usage is surely a blessing!


Tagged : / / / /

How to Automate Your Business Through IFTTT

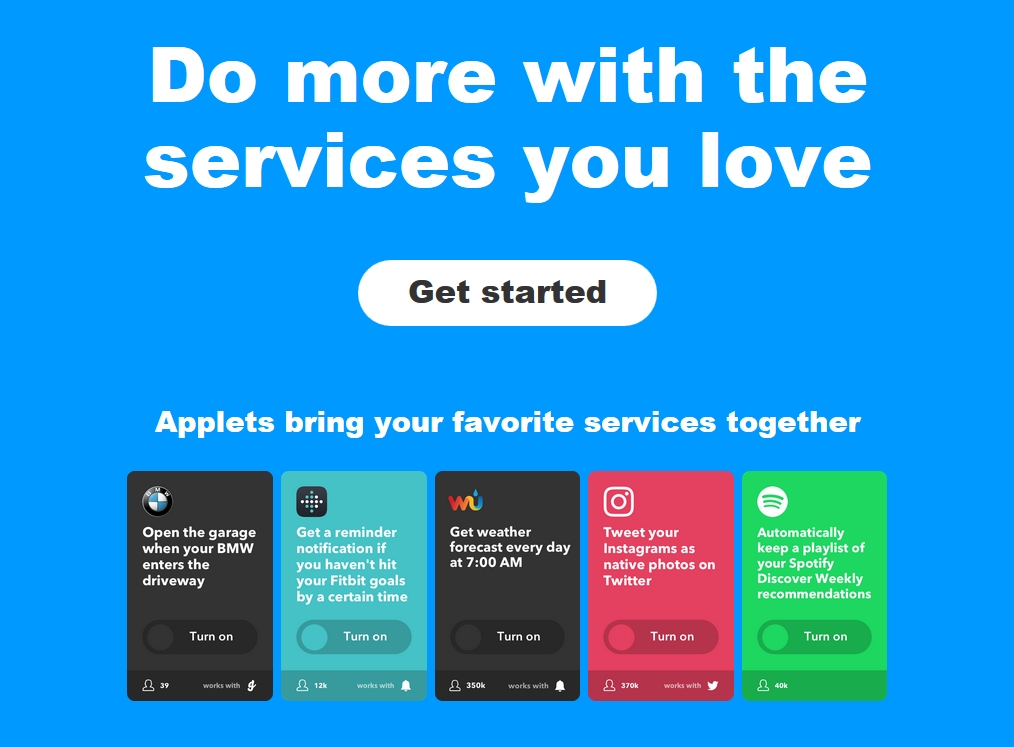
Are you looking for a way to connect different products and services to boost your business? IF This Then That, commonly known as IFTTT is a web tool to do so. Today, it is nearly impossible to run a successful business without being active online. The social media have got a hell of a lot more power than you think. The promotion and advertisement on social media is the most value nowadays. IFTTT connects different apps, products, and services together and eases things tenfold.

How to Automate Your Business Through IFTTT 2

How Does IFTTT Work?

Let’s explain the working of IFTTT through an example! You need to post on your twitter, Instagram, and Linkedin accounts something you just posted on Facebook. If you have access to IFTTT, you can connect all these apps together and it will automatically post it for you. That’s how it automates your day. Well, this is just a simple example. There’s a lot more you can do.

To have a better understanding of its working, have a look at the following steps

  • “Applets” is the term it uses to mention the connection between two services.
  • The first connection that is supposed to be connected with the rest is known as the “trigger” and the second one is called the “action.”
  • So, in the above example, the Facebook which is to be connected with the other apps is the trigger and the apps connected to Facebook (Twitter, Linkedin, and Instagram) are the actions.

How to Automate Your Business Through IFTTT

How to Use IFTTT Social Media Applets?

The most amazing fact about IFTTT is that it’s free. What else do you need when you can automate your day at free of cost? Let’s talk about how social media applets work.

  • IFTTT keeps your Facebook and Twitter profiles connected via syncing. It reduces your workload while simultaneously increasing your business. With this social media applet, when you upload your Facebook profile, it gets automatically updated on Twitter.
  • Just like your Facebook picture, your Instagram posts can also be uploaded on twitter via an option “share on twitter.” However, note that anything that is posted from Instagram to twitter appears as a link.
  • The most exciting feature is the applet that connects your twitter hashtag to the Google spreadsheet. When you tweet anything as a hashtag (let’s say you promoted your company’s name or the new product you are about to launch), it automatically gets shared on your Google spreadsheet.
  • You can also send live twitter updates to a channel. With this applet, you can send your twitter updates, anything from recent posts to a hashtag, to any slack channel you want.

How to Use IFTTT Campaign Management Applets?

Now, moving on to the ways of managing campaigns through IFTTT, which is yet another amazing feature.

  • While doing marketing such as planning a new MailChimp campaign, it is healthy for your business to keep people updated. When you plan a MailChimp campaign, IFTTT uses an applete and automatically updates your schedule in the Google calendar.
  • You can also sync social media buffer posts to the Google calendar to enhance your campaigning. I have already shed enough light on the importance of social media in terms of promotion and advertisement. Same is true for campaigning.
  • Now, let’s talk about the most important applet! All the businessmen are well aware of the importance of stats and calculations. If you need to keep your business balanced, it must be measured accurately. IFTTT also eases this burden for you by syncing the stats of a MailChimp campaign to the Google Spreadsheet. It gets easier for you to see the important information such as the open rates and clicks.

In a Nutshell

IFTTT isn’t just a web tool, but a way to ease your business tasks. While doing a business, you face time constraints and it gets difficult for you to be active in the Internet world. This tool was developed to automate your business. It works like an automatic car where you just have to sit and handle the steering; the rest will be handled by the tool itself.

Tagged : / / /

10 Awesome Plugins to Let You Share Your WordPress Posts on Social Media Automatically

10-awesome-plugins-to-let-you-share-your-wordpress-posts-on-social-media-automatically

So you have the best site or blog? Well, even if you do, it can still be hard to maintain a following and carry on attracting visitors if you don’t have social media presence. Content marketing is of prime importance for a successful website or blog. It may add a bit of cost and time to make relevant posts and sometimes you might just forget to update social media accounts. You need to make sure that you content is easily discovered and shared via social media which increases traffic and engagement.

Fortunately, there are many WordPress plugins that automatically shares your posts to social media as soon as you click publish. The plugins that we have gathered will simply automate and streamline the process for you along with providing you with some handy and useful features. Each of these plugins either have similar or varied functions.

You can decide for yourself which one is most workable for you. If you are someone who has a WordPress blog or website, then you should definite give one of these plugins a shot:

1. OnlyWire

onlywire

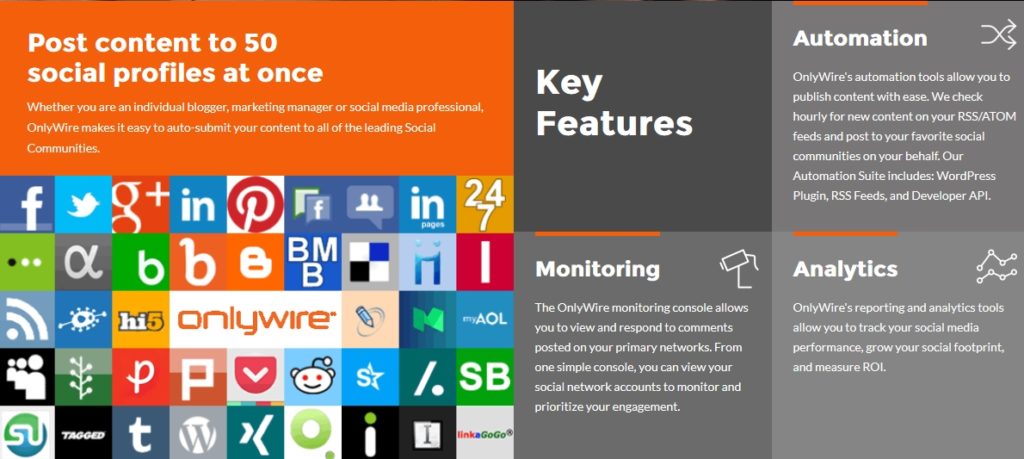
OnlyWire is among the pioneering tools when it comes to automatic social sharing. It integrates with your site’s RSS feed and automatically converts the entries into social media posts. A free account allows you to share to four social media accounts using one RSS feed. In case you want to share up to 50 networks and 3 RSS feeds, then you can upgrade to a Premium account by paying $4.99 per month.

2. NextScripts Social Networks Auto Poster (SNAP)

nextscripts-social-networks-auto-poster-snap

This is a great multi-featured plugin that allows you to post to over 27 social networks. Along with Google+, LinkedIn, Twitter and Facebook, it also integrates with blogging platforms such as Livejournal and Tumblr. However, you need remember that social networks such as Google+ and Pinterest need an API Library setup which only works with the Pro version with a one-time payment.

One of the dominant features is conversion of categories and tags to hashtags when posting to Twitter. It also allows you to automatically import Facebook comments to WordPress comments and customize message formatting for each network.

3. CoSchedule

coschedule

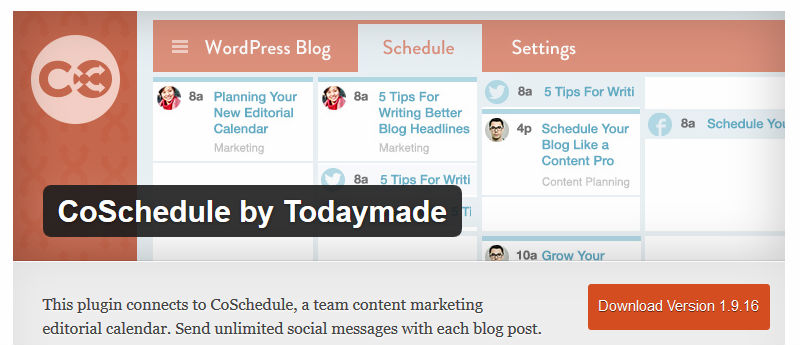
CoSchedule is basically an editorial calendar app that comes with a plugin for WordPress and allows you to schedule posts in a calendar view. You can hand le both blog and social media posts from one simple interfaces. The drag and drop feature allows you to reschedule a post easily. It makes social sharing and scheduling posts easy.

You can use this plugin for a multi-user WordPress site since it has a team feature. It allows the users to interact inside each blog post entry in the calendar. You can use it for free for 14 days and after it requires and upgrade with a solo plan that starts from $19. The free version contains all the basic functions but you can only integrate it with five different accounts whereas the paid version comes with support for extra social networks and extra team members.

4. Pinterest Automatic Pin WordPress Plugin

pinterest-automatic-pin-wordpress-plugin

This WordPress Plugin is for you if you are someone who pin lots of images from their posts on Pinterest. As soon as you publish a post, all the images get automatically pinned to your Pinterest account.

It comes with one drawback. It has no free version but the paid version is just a one-time payment of $16. It allows you to pin from both thumbnails and featured images and pin unlimited images along with integrating with WooCommerce and delaying or scheduling pins.

5. Jetpack

jetpack

Jetpack provides you with a suite of WordPress enhancement features such as revamped comment system and improved statistics. It is a standard post-to-post conversion but comes with an added advantage of immense accessibility and sensibility. One drawback is that it doesn’t work with Google+ or Pinterest as they are API service.

6. Revive Old Post

revive-old-post

If you have been blogging or running a website for quite some time, then you probably have some content gat need no editing at all before presenting in front of a new audience. It sure takes up a lot of time to search through archives which is why Revive Old Post automates the process of sharing old post to different social network accounts. Now this plugin event integrates with LinkedIn along with Facebook, Tumblr and Twitter.  It works even if you have multiple social accounts.

It doesn’t allow you to edit posts that you send to your accounts but this plugin works well if you want your content to be visible with various social networks. With the Free version, you can only automate twitter accounts. It has three paid upgrades: Personal Upgrade, Business Upgrade and Marketer Package. You can choose according to your needs. It is money well spent.

7. WordPress to Buffer

wordpress-to-buffer

In case you have Buffer account, this WordPress plugin is just perfect for you. It allows you to do your social sharing without letting you do it manually. WordPress to Buffer simply automates the process of pushing your new posts into Buffer. This plugin requires authentication to work along with a technical set up before it is good to function. The basic free version works with most social media networks like LinkedIn, Google+, Facebook and Twitter but in case you want to publish it to Pinterest, you have to upgrade to paid Pro version.

8. MicroBlog Poster

microblog-poster

MicroBlog Poster lets you connect multiple accounts from each kind of social media account including Tumblr, LinkedIn, Twitter and Facebook. Other networks it works with are Blogger, Plurk, Instapaper, Vkontakte and Delicious. Along with posting new content, it lets you post old content too. You can even schedule social media posts already published. For all this, you have to pay zero money.

9. HYPESocial Buffer

hypesocial-buffer

HYPESocial Buffer contains tons of features and integrates well with WordPress. It gives you the liberty of managing your website, blog and multiple social media accounts with just one single interface. Some of the additional features consist of automated URL shortening and custom scheduling.

It comes with 3 kinds of license that are paid. The ‘Personal’ license supports one website and for one year. Secondly, ‘small business’ license is good for two more websites. Finally, the ‘agency’ license works with unlimited sites.

10. HYDRAVid Syndicate

hydravid-syndicate

HYDRAVid Syndicate is web-based software that works with WordPress plugin and let you syndicate unlimited videos and posts on unlimited social media and video websites. Not only will you utilize HydraVid Syndicate to instantly and automatically post to an unlimited number of social sharing sites  PLUS Instantly post to a guaranteed network of 250+ aged websites.


Tagged : / / / / /

How to Index Your Apps on Google

Apple app store and Google Play Store keep on filling up more and more every single day. Did you know there are more than 3.1 million apps right now? So how do you increase the visibility of your apps among tons of apps out there? It is not an easy job to stand out of the crowd, no matter how flawless your app may be. It is no wonder that app store optimization has taken the app world by storm over the last few years. Ever heard of App Indexing? No, then you should. App indexing is a very LESS costly system that small businesses in particular can profit from. All you have to do is give it a bit of your time and effort to complete all the stages needed to reach your goal.

how-to-index-your-app-on-google

What is App indexing?

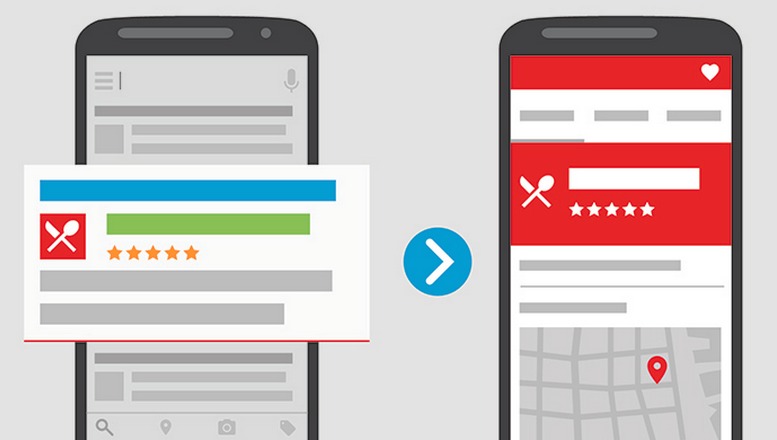
A little introduction wouldn’t hurt. So what does app indexing really do? When people enter a keyword related to your app with their mobile phones, Google can show your app on the top along with other websites in the list. This is what app indexing basically does. This service of Google makes users find your app in search results when using their mobile phones with an install button.

Clicking on this button will lead users to Google Play or App Store in case the user has not installed it or the Android/iOS app in case it is already installed. It doesn’t matter whether it is from Google Play Store or App store. It will allow you to increase your retention rate of registered user and increase your installs volume.

A Bit of its History

Let’s go back in history and get to know where App Indexing really came from. It was in October 2013 that Google app indexing was first launched, but it was available to only very few developers. It was not until June 2015 that it became open to all. Then Google went on to include support for iOS via Chrome in May 2015 and further announced support for app indexing within Safari in October 2015. However, it is compatible solely in devices with either iOS9 or above. Its final transformation took place this year when Google indexing became Firebase App indexing available for Android and iOS applications.

App indexing is an evolved version of traditional SEO as it has quiet some streaks of SEO. What you have to do is index the content of your apps in Google search so that the traffic gets distributed to your app. To make that possible, it was necessary earlier to have your web and app similar. However, that’s not the case anymore. Since the mid of November, native apps can be indexed even if they have no similarity with the web. Yet another wow factor is the ability to see an ‘App Streaming’ feature with your app contents. That means users can preview the app before making a decision to download it.

Benefits of App Indexing

The benefits of app indexing are huge. All it requires is some effort and time from your side in order to implant app indexing to your app. Here are six major benefits:

1) Improves your visibility on Google Search Mobile

If you have app-indexed your app, it will end up on the first page of search results and become easily discoverable to your users. Google displays your app description along with the app icon.

2) Improves advertising revenues

App Indexing and AdMob can go hand in hand to enhance the quality of targeted ads and increase your advertising revenue. If you have implemented app indexing strategy properly, you are bound to get better revenues. Usually, average app’s CPMs are more than web’s CPMs.

3) Increases browsing time

User experience is better in app compared to mobile web which translates into longer sessions.

4) Increases traffic of active users to the app

When app indexing causes users who have already installed the app return to your app, it actually means your brand has been reinforced. Your app usage has increased.

5) Increases CTR on Google search mobile results

What happens is when your user has installed your app and they attempt a search on google search, the result will be icon of the app. It is true that visual results only increase the chances of getting it clicked.

6) Increases amount of organic installs

If app indexing results in your user install the app, it only increases your installs and such cases result in high satisfaction. The install button for the app is displayed right beside the homepage search result giving the user the access to install your app.

benefits-of-app-indexing

How to Index Your iOS App On Google

1) App indexing service uses HTTP URL for iOS9. What does this mean? This means the developer has to follow some step in order to implement this support into his app. The developer needs to use UIApplicationDelegate protocol in order to open the right content of the app in cases user clicks a link that is displayed by Google in search results. In case you have already followed the steps to support universal links to your app, then you can skip this part. If not, then you have to add handling for universal links and make an app-to-site connection.

2) Now you need to form association between your app and the website. The Xcode requires apple-developer-associated domains entitlement for the purpose of listing every single domain associated with the app.  Next, you have to make a file called apple-app-site associated for every single associated domain.

3) After completing the setup for app indexing, you can test and check if you have successfully completed the steps. You can easily preview the search result on iOS. However, remember you cannot test universal links in Xcode simulator. In that case, you need to tap a universal link in Safari on your mobile device.

4) Now it is time to improve your app’s ranking. For that you need to offer high quality content in your app. Make sure you follow all the guidelines from google to come up with a well-designed app and have a responsive website. Only then, go on to measure the performance of your app.

How to Index Your Android App On Google

1) App Indexing for androids make use of HTTP URLs in order to display your users the content of your app. If you want to give your users a great experience, then you need to focus on the content that your user is likely to search.

2) Secondly, connect your app with your website. To do this, you have two options. You can either use Digital Asset Links that needs at least How To Index Your Android App On Google Android 6.0 Marshmallow or you can use Search Console. Google announced that you can make use of this service even if you don’t have a website provided you have a great content inside your app. In case you don’t have website that you can associate with your but you want to utilize App Indexing, you can simply fill a form and make a request for App Indexing solely for the app. It is known as Indexing App-Only content.

3) Now add intents to your android app. All you have to do is open your app in Android Studio and go to AndroidManifest.xml in order to add the intent filter for HTTP URL. You need to create intent filters and logic in order to handle deep link intents. In case you are confused, you can check out the well explained tutorial from Google for a better understanding.

4) Now you can give your user good content considering his search. It will be handy for developers to skim through samples from Google.

5) Your app is now ready to be uploaded on Google Play Store.

6) As an added step, you can make a noindex.xml file so that you can choose some pages of your app that you don’t want to be displayed in search results. Make sure you add its reference to AndroidManifest.xml.

7) If you want your already visited app pages in search autocomplete list, you are required to add the App Indexing API to your app. This comes with some steps that an android developer can easily handle, but in case of any confusion there is a complete tutorial provided by Google.

8) Testing your procedures is very important. Check out the official page which consists of a variety of testing methods.

9) Analyzing your performance is also a crucial step. For this, search analytics serves as an extraordinary tool

10) The best part is that Google offers its assistance on every single step and lets all the developer know how to create high quality content by providing them with important guidelines.

Common mistakes to avoid when implementing app indexing

Do you want everything to come out well? Then make sure you set up app indexing properly. Here are some common mistakes that you should avoid at all costs:

  • As soon as the user reaches a content driven for app indexing strategy, make sure he has the freedom to step back without much hassle. Let things be easy for your users.
  • Make sure that the content you show in your app and the web should be either similar or identical. If they don’t go with each other, things can go awry. Remember you can fix it directly on the search console of your app.
  • The results page of Google’s autocomplete system displays a list containing titles about the content of apps. Do you want your app to appear in one of those titles? Then you need to make titles that are directly associated with the web content. If you don’t follow the guidelines properly, google may stop displaying your results in the autocomplete system.
  • Another thing you should be careful about is that if a user visits from app indexing, then that should take him directly to some content within your app. Make sure users don’t reach to an advertising message before they see your content.


Tagged : / / / / / / / /

10 Proven Ways to Make Money on YouTube

Have you heard about regular people earning money on YouTube? Have you ever asked yourself, “Can I do this too?”. Earning a big amount from the internet probably doesn’t sound realistic, but you actually can start earning money quickly from YouTube, especially if you have the thing in you and you can entertain your viewers easily.

YouTube has a very large viewership and it increases every month. Many people are already making money there. YouTube adds one million new creators in its YouTube Partner Program alone and that’s huge. So now, put an end to thinking and start doing it. It’s easy to get started and before you know you will be ready to monetize.

There are a lot of ways to make money on YouTube, follow the guide below to know about them.

1. Use YouTube to get traffic to your website and blog

use-youtube-to-get-traffic-to-your-website-and-blog

If you have a website or blog which gives you an income, you can increase it by having more traffic on your website. Many websites and blogs were hard-hit by Google’s Panda, Penguin and Hummingbird upgrades. If this happened to you too, you can use YouTube to not only regain the traffic, but also increase it. Get started using the Creator Playbook. Once you’re set up, consider re-posting some older content, as well as creating new content, whether writing your content or directing it, just post whatever you are doing.

Make sure that you link to your own website in the first line of your video descriptions, so you can give a direction to your YouTube traffic to where you want it to go.

2. Sell your own products and make money on YouTube

sell-your-own-products

Did you know, that after Google, YouTube is the second in line for the largest search engine around the world? From a marketing point of view, one would not miss such a massive resource. One of the best money making technique is to use YouTube to sell your own physical products.

3. Sell others’ products as an affiliate marketer

sell-others-products-as-an-affiliate-marketer

“Affiliate marketing” means earning commission by promoting others peoples products. A lot of companies offer attractive wages to affiliate marketers who promote their products, including huge companies, like Amazon and eBay, as well as smaller companies.

All you need to do is to select the right product, make a video around it, and put the link in the description. You earn per sale of the product and usually the payout is pretty nice.

4. Create a Web TV series

create-a-web-tv-series

YouTube lets you create your own Web TV shows. You can create a comedy series, a drama series, or whatever you want. Be aware that YouTube limits your show’s length to 15 minutes until you’ve become a partner.

If you are a good writer, or you can be a good director, try to manage a few more friends together and record your own TV shows.

5. Become a YouTube star

become-a-youtube-star

YouTube star can earn huge. BB for example, has almost a billion channel views. At $7 per thousand video views, the income soon mounts up. So, if you have got innovative ideas, or you are passionate about your work, make your YouTube channel! You never know, you might be the next YouTube star.

6. Monetize your videos

monetize-your-videos

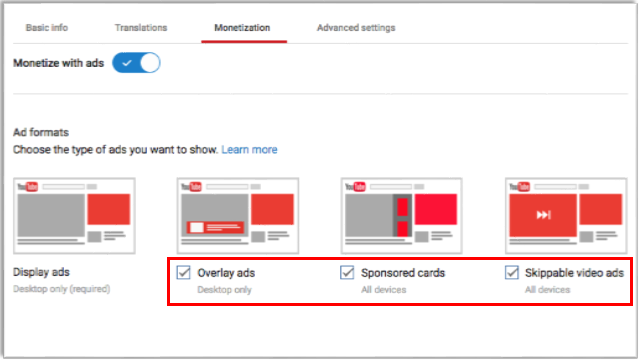
If you’ve made several videos, and spent time building subscribers to your YouTube channel, it’s time to join the YouTube Partner Program. All you need to do is enable your channel for monetization, and you’ll receive your share of the income from advertising on YouTube. Just as YouTube stars do, you’ll get paid for each thousand views on your videos.

7. Make tutorials

make-tutorials

Tutorials are a very common way to earn money from YouTube. If you know how to do something, you can teach others by making videos of it and make money from your videos. Beauty, fashion, sports, cooking videos are insanely popular and people earn a lot from them.

8. Test your products

test-your-products

You can even do a market research on YouTube. If you have an idea you can make videos on it and post them on YouTube. You can soon discover whether your brilliant, innovative idea is likely to be profitable or not.

For example, if you’ve got an idea for a product, but don’t have the budget for it, create some videos before doing anything big. The views and comments on your videos will tell you whether your idea is feasible in its present form or not.Even if it’s not, you can still make it feasible by going through the comments and reviews given by your viewers.

9. Attract sponsorships

ttract-sponsorships

If you observe the most successful YouTubers, you’ll notice so many sponsorships and advertisements that they have in their videos.To get the sponsorships you have to get the attention of the viewers because once you have good viewers only then companies would want to have their products marketed in your videos.

The best thing about sponsorships is that you do not have to give YouTube anything out of it. Plus, you can negotiate whatever contracts you want based on impressions and the size of your audience.

10. Be a brand using YouTube

be-a-brand-using-youtube

YouTube helps you to make you a brand. Whatever you’re doing, and whatever your job is, YouTube can help you to become known for things you are good at, and make money. Even if you have no idea on how you could make money on YouTube, get started creating videos about your interests. You may just find a crowd looking for stuff like yours.

That’s how you can really make money with YouTube.

Happy Earning!

Tagged : /

10 Things You Should Look For When Purchasing a Smartphone

In this era in which smartphones are flooding the market each month and announcements like “the next big thing”, seems to be coming every day. Attracted by remarkable features, innovative designs and so many specifications, consumers have a lot to choose from, too much to choose from, in fact.

10-things-you-should-look-for-when-purchasing-a-smartphone

Buying a new smartphone is a big purchase decision. Your smartphone is your constant companion and your instant connection to the world. No matter what kind of a user you are, having web browser, instant messaging and dozens of applications at your fingertips is a must in the modern day life. Because your smartphone plays an important role in your everyday routine, choosing a new device isn’t a decision you should take lightly.

1. Choose an operating system

For most people, the deciding factor will be personal preference. Those looking for a simple interface and a security system will most likely go towards iOS phones, while those looking for more custom options and a lower cost prefer Android or Windows phones.

2. Determine your price range

The second though most important step is to determine your price range. iOS phones are typically more expensive than Android smartphones. Among the smartphone manufacturer companies, Apple and Samsung are typically among the most expensive, while HTC, LG and Motorola tend to produce cheaper smartphones.

3. Pick a screen size

What should be the right size? The ideal screen size ranges from 4.0 to 5.0 inches, because handsets in this range are easy to hold and maximizes functionality. One more reason of this range being ideal is because in this range handsets are neither too big nor too small.

Users who are mostly reading e-books, surfing on internet and watching movies are likely to prefer bigger screen sizes.

4. Pick a screen resolution and quality

The display is the first thing you see when you turn on the screen. As a result, manufacturers are not only concerned with the size of the screen, but with the quality of it as well.

Apart from considering the screen size, pay close attention to a smartphone’s resolution, brightness and viewing angles. Make sure that the smartphone you are purchasing has a panel that is bright enough for you to be able to read it outdoors in direct sunlight.

Having wide viewing angles are important too, because you will want to be able to share your screen with others and play games on it.

5. Choose between virtual or physical keyboard

It is important that you determine what kind of usage you will be doing on your smartphone. If you are a user that has to write intense emails and quick messages, then you should likely go towards a physical keyboard. If not, choose a virtual keyboard.

6. Consider Phone’s Battery life

You can have the fastest automobile in this world, but if it is out of gas, it’s not going anywhere. Likewise, poor battery entirely destroys the purpose of having a smartphone.

When buying a smartphone, make sure it has at least 3000 mAh battery and 15-18 hours of talk time. Smartphones with such specifications should last for a full day of use or close to it.

7. Consider the Camera Quality

Nowadays people are choosing smart phone cameras over digital cameras, and that is the reason why manufacturers are working so much on the camera.

You cannot determine the quality of a smartphone’s camera by just looking at its specifications. An effective way to find out the quality of a phone’s camera is by looking at test photos and videos.

8. Choose RAM and processing power

Each year, manufacturers add more and more processing cores into their phones. The more the processing power of a smartphone, the faster it will be. When purchasing a smartphone, try to go for the one having at least 2GB RAM and a high processing power.

9. Check the storage space

Pricing changes significantly between storage variants of some phones. However, this usually occurs with the devices that do not support external storage. Therefore, buying a phone with expandable storage is the best choice. Buying additional storage is relatively cheap.

Many phones offer 32 GB or more expandable storage.

10. Pick a carrier

Considering the right carrier is always very important. One preferred way to check which carrier is best in your area is by reading reviews of people or asking them personally.

Different carriers offer different payment plans and contract combinations to reduce the up-front cost of smartphones, go for the one you think will work best for you.

CAN YOU TRULY HAVE THE PERFECT SMARTPHONE?

With so many features to look for, almost any phone out there will fall short in at least one of them. The key is to choose a phone that has most features that you are interested in.


Tagged : / / / / / / / / /

How to Start Programming iOS Applications from Scratch

“Will I be able to become a programmer?”

“How can I build an application?”

“Can I start without having any experience?

These are some very common questions asked by beginners who want to learn how to code. Programming can be self-taught and no matter how inexperienced you are, you can still learn how to do it.

Programming isn’t that difficult as long as you have the desire to learn and have a consistent behavior.

My approach will be to slowly introduce you to the concepts as you need them, rather than to give you everything at once.

how-to-start-programming-ios-applications-from-scratch

Today each iOS application has so much significance in individual life that users get used to them so easily and can never get out of it. But gone are the days when people were to make iOS applications in dark and dry environment. Today, anybody who considers himself “a man with ideas” with limited technical resources and abilities can build an application of his own. But HOW? This guide will take you through the entire process.

WHAT DO YOU WANT TO MAKE?

Firstly, you should have a sketch. For instance, ask yourself some basic questions, such as these:

  • What will be the application about?
  • What information will each screen have?
  • What should be the size of objects on the screen?
  • What will be the primary action in the application?

Making an outline is a very effective way to add numerous creative and new ideas to your application as you go along.

GETTING STARTED

Apple provides a number of tools which makes it easy for the developers to build iOS application with no difficulty. Downloading the Software Development Kit or SDK from the app store gives you access to the main tools for developing your application. The download which only costs you a few dollars will give you access to Xcode, Interface Builder, Frameworks and tools for testing your application.

Xcode

xcode

Xcode is a software package, a set of interrelated programs that work together, used by developers to build iOS applications.

The best thing about Xcode is that it is not just a code editor but it has a lot more in it. It helps you to write a program, compile it, load it onto a device, sniffs out bugs from your code and ultimately submits it to the app store. When you will open Xcode, you will see a button at the center of the screen which says “Create a new Xcode project”. Click on that button.

In the column on the left hand side, you will see the OS X section, click on Application and select Command Line Tool.

Click “Next” on the following screen and fill in the fields Product name, organization name, company identifier, type, and tick mark the “Automatic Reference Counting” dialog box. And begin designing your app

Interface Builder

interface-builder-ios

A good user interface can be the difference between a highly successful application and its failure. There must be a perfect balance of amazing looks and simple navigation in your user interface.

Interface Builder is an application which enables you to build an effective and balanced user interface visually. You can do that by simply dragging the built-in tab bars, buttons, labels and sliders onto the application’s interface.

If you are a new iOS developer, using Interface builder is highly recommended because it allows you to work on custom interface.

Frameworks

frameworks-ios

Framework is one of the most important piece of the puzzle. With a Framework you can easily create an application that will run on Mac iOS and OS X.

Apple provides numerous frameworks which allow new app developers to add and draw graphics on the screen, play audio and video, create user interfaces, take pictures, write networking code and display web pages and so on.

When you are done with the making of your application, it’s time for it to be tested.

  • Click “Simulator” and then “Debug” from the drop down list. Then press “Build and Run” to start the test.
  • Make sure your iPhone, iPad or iPod is plugged into a USB port while testing the application.
  • If your application crashes, first you need to Google the error message and check what it means and you have to check the memory usage at the same time. Debugging can get a bit frustrating, but don’t give and remember, the more applications you build, the better you get at it.

The iOS Developer Account

the-ios-developer-account

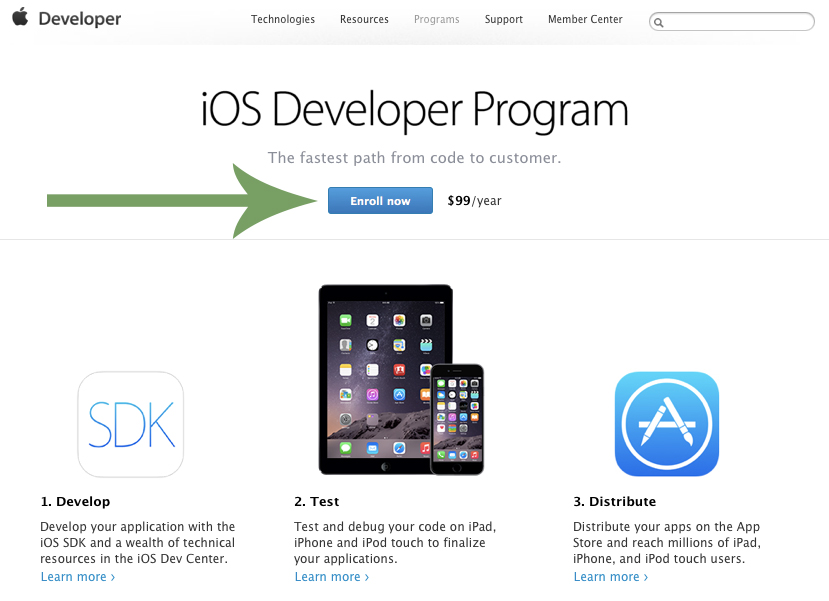
You will need an Apple Developer license to test your application on an iPhone, iPad or iPod. So, you need to sign up for a developer account, and once you are done, you can start distributing it to the app store.

Again, remember you are a beginner, so a lot of things are going to be very difficult at first. You just have to keep trying and not to lose hope and as you will gain more experience, things will get easier.

HAPPY CODING!

Tagged : / / / /

Pokémon Go – It’s All the Rage! And here’s everything that you need to know about it.

Pokémon Go - It’s All the Rage! And here’s everything that you need to know about it.

If you’ve recently been on the internet or even out for a stroll in the park, chances are that you’ve already noticed a game by the name of Pokémon Go taking the world by storm. Since its release, tens and thousands of people around the globe have succumbed to the phenomenon. And if you’re someone to whom the name Pokémon is unheard of, you’ve probably raised an eyebrow or two at the flocks of players (read Pokémon trainers) armed with smartphones rummaging through streets, parks, rivers and national heritage sites in quest of virtual creatures called Pokémon. You might have wondered what the hell is going on, and here’s exactly everything that you need to know!

The Origin Story

Pokémon is a Nintendo franchise that has its genesis in mid-1990’s when Nintendo first published Pokémon Red and Green in Japan. It took off from there and the world of Pokémon and the franchise itself progressively grew through the decades. In the Poke-world, “Trainers” embark on a journey to catch monsters called Pokémon and use them to battle each other. As the franchise suggests, a trainer’s ultimate goal is to become a Pokémon master by catching ‘em all, and there-by defeating Gym leaders and the Elite Four.

What is Pokémon Go?

Every 90’s kid’s dreams turned to reality on July 6th 2016 when Niantic Labs released Pokémon Go – the latest and greatest installment of the Pokémon franchise in form of an augmented reality mobile game. And just days after its official release the application has already exploded in popularity and broken all records with millions of downloads worldwide; in turn adding $9 Billion in value to Nintendo’s stocks. Available for free on the IOS and Android App stores, the game pretty much makes use of the same concept as its predecessors on Nintendo’s handled consoles and the goal still invariably remains to catch ‘em all. However what’s revolutionary is the augmented reality, where trainers interact with real world objects to progress farther into the game.

The game makes use of the phone camera, GPS and clock to mix real world and game-play and present an augmented reality experience like no other. So if you are by the lake, you are more than likely to encounter water-type Pokémon, whereas strolling through parks and fields will lead you to more grass and bug-type Pokémon. Similarly, the dark of the night reveals more ghost and fairy type Pokémon’s that you can locate using your phone camera. Which means that you actually have to get on your feet and go around looking for Pokémon’s and explore the real world. This may explain the flock of entranced millennials and kids that you’ve probably noticed snooping around the neighborhood with their phones. The game also has Gyms and PokeStops often marked by real world locations such as monuments and churches; creating spots for trainers to meet and duel. Gyms are where trainers can battle gym leaders and gain experience. Whereas PokeStops are like digital shops where trainers use real money to buy items and supplies to help them level up in the game and catch rare Pokémons.

Why Is the Game So Massively Popular Today- 20 years from its genesis?

Simply put, the reason behind the Pokemon Go’s sensational popularity is that every 90’s kid with a Nintendo or Pokémon cards had been patiently waiting for this day to come. It taps into their nostalgia and is an embodiment of all the childhood dreams. The game is also free to download which makes it all the more accessible to people of all ages.

What’s Niantic and Google got to do with Pokemon Go?

John Hanke is the mastermind behind the Pokémon Go. He launched Niantic Lab in 2010 as a google funded startup to create game layer on maps. It was in 2014 that Google and Pokémon first partnered with Niantic Lab for an April fool’s Day joke, which allowed Google Maps users to spot Pokémon’s on the map. It was a viral hit and gave John the idea of turning that April fool’s day joke into an actual game someday- Fast-forward 3 years from then and we have the massively popular Pokemon Go breaking all application records left, right and center.
Go Catch ‘em All

What’s Niantic and Google got to do with Pokemon Go

Now that you’ve read through this post and have learned everything that there is to know about Pokémon Go, perhaps it’s time you give the app a shot and embark on your own Pokémon journey and travel far and wide, meet new people and become a Pokémon master you never thought you could be.
And always remember, Gotta Catch ‘em All!

Tagged : / /