Shadab Khan Durrani

10 Robust Marketing Tools to Create Best Facebook Ads Strategy

Are you a Facebook marketer who wants to learn the ways of increasing the conversions, ROI with dirt cheap CPC of your ads? It’s all the game of ad strategies that I am going to tell you in this article. The Facebook ad strategies are all about knowing your audience and then attracting them towards your business. Having a sound Facebook ads strategy will take you to the right and motivated audience for your business.

The world of Facebook is wider than just posting, commenting, and tagging. Since the entire world has been combined on a single platform, it’s easier to connect them all from a marketing standpoint. Scroll down to learn about some of the best tools you can use to master your skills as a Facebook ad strategist.

1. Adsviser 2.0
Adsviser 2.0

In order to attract your audience, you must throw an appealing ad for them, but for that, you have to know about the ongoing ad campaigns. Isn’t it tedious for you to search for a specific campaign among a hundred others? Adviser 2.0 skims down these options for you and enables you to track the most successful and latest ones. As a result of this, you get to see what’s so appealing about these campaigns and why people are allured by them. By doing so, you can copy those ideas to your own campaign in the hope of gaining profit by increasing your customers.

2. AdEspresso

AdEspresso

Facebook ad strategies were never as easy as they are now, and a huge credit goes to adespresso. One of the toughest parts of Facebook ad marketing was A/B testing that adespresso has simplified up to a great extent for you. Creating multiple variants of your ad was such a distressing process, but not anymore. Within just three clicks, you can now make not hundreds, but thousands of variants of your very own ad. Your preferences will be saved by default and all of your media will be stored, so you don’t have to worry about uploading the same picture all over again.

You are also able to conduct a powerful and error-free analytics and optimize the results of your campaign through adespresso without having several clustered databases.

3. Interest Explorer
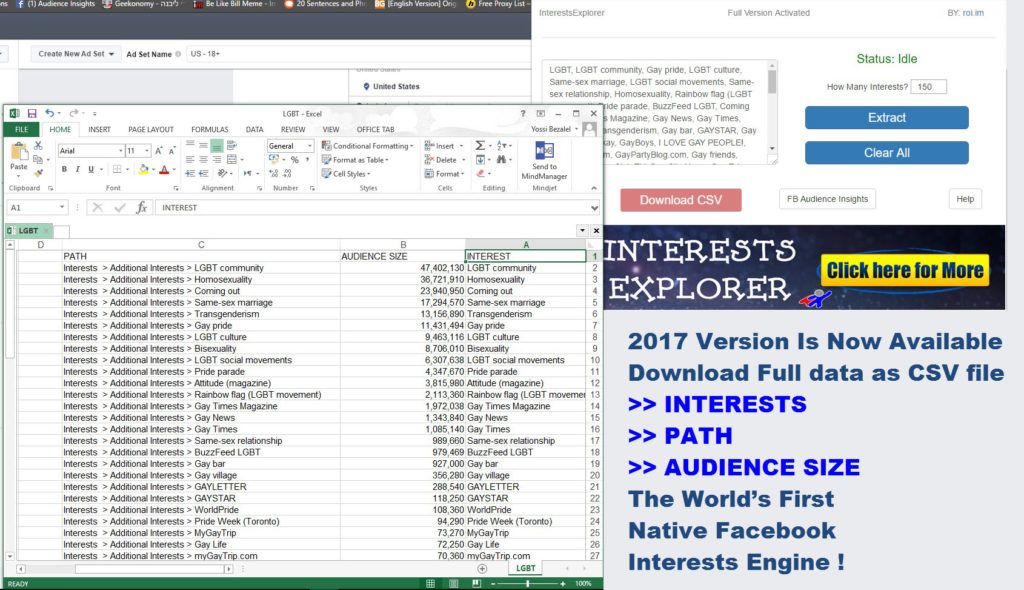
Interest Explorer

Do you want to take your business to its zenith through Facebook? If yes, then interest explorer is worth trying as it is the world’s first interest cloud engine of Facebook. It took ten long years for the software professionals to design this program to ensure zero chances of inaccuracy and inefficiency. It is the fastest search engine in the market that finds out the most lucrative interests on Facebook in no time. What makes it even more interesting is that it allows its users to have multi licenses and install it on three systems at a time. So, don’t waste your time and nerves and use interest explorer for the most profitable interests and to target your campaigns accurately.

4. Social Interest Freak
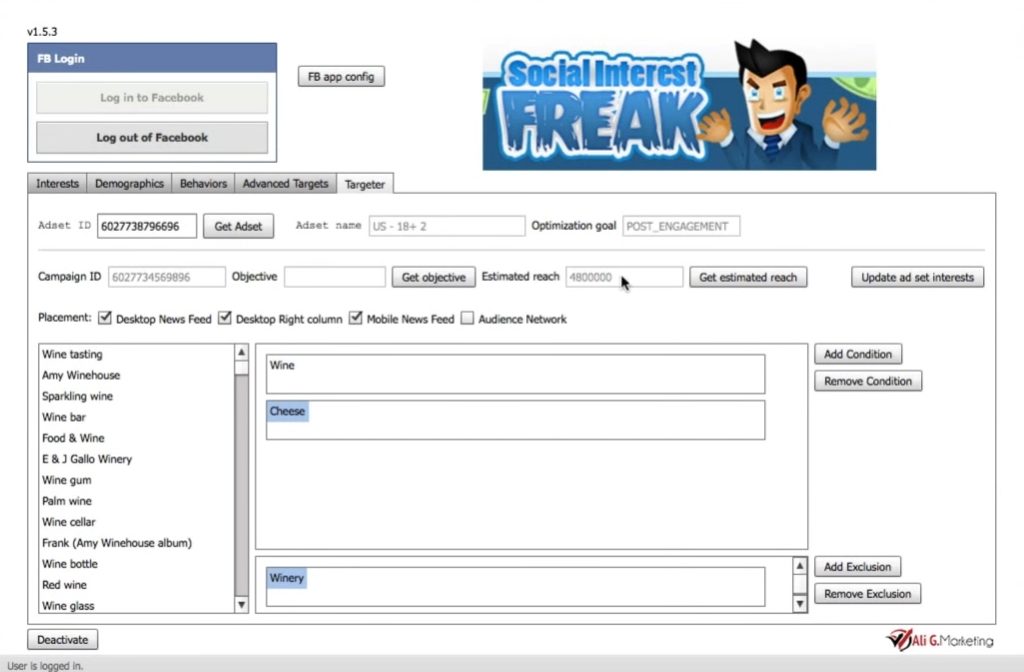
Social Interest Freak

Do you know how to “laser target” the audience you need? To tell you the truth, I didn’t know either before knowing about social interest freak. Facebook marketing get ultra advanced when it came to the market. It specifies your audience for you by unveiling to you their behaviors, interest, demographics, and other personal traits. Once you identify these characters, it’s a piece of cake for you to focus on the audience you need. That’s how it “laser targets” the audience for you! When it was released, only the Facebook managed clients had an access to it, but now, it is easily reachable to everyone. Isn’t it interesting to know about the education, job titles, location, etc. of the Facebook users and skimming down the ones you need out of them.

5. Turbo Ad Finder
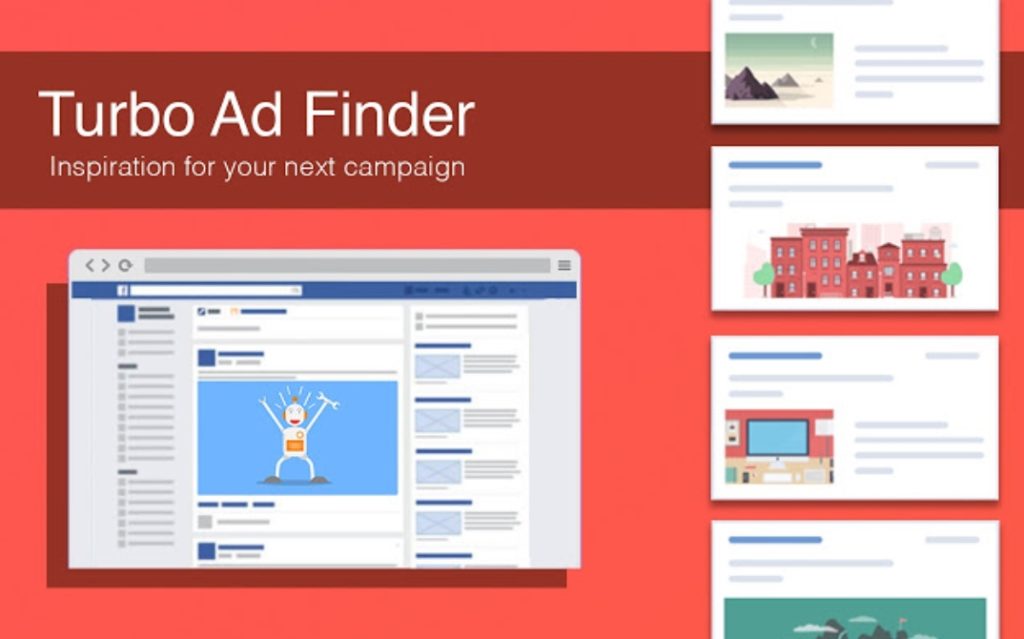
Turbo Ad Finder

Before moving forward, I would like to drop a piece of advice here. If you are a permanent Facebook marketer, keep Google Chrome installed in it even if you don’t use it. Now, why am I saying this? You must be wondering! There are some amazing Google Chrome extensions for Facebook marketing and the Turbo ad finder is one of those.

It acts like your marketing researcher by eliminating all the unwanted posts from your newsfeed and bringing up just the ads; thereby allowing you to have an insight on competition level you have to meet and exceed with your competitors. Observe and notice the top visited ads and see what more you can do with yours to have more customers.

6. Smart Ad Builders

Smart Ad Builders

Creating a high converting ad is a helluva lot more difficult than it sounds, especially with the proven and tested templates. Smart ad builder is the software that has been designed to make it simpler for you. No matter how magnetic the graphics in your ad are, you need some engaging content so that people would know what your work is all about. Apart from including striking images, smart ad builder adds captivating text in the body of your ad by default. It’s absolutely user-friendly, accurate, and efficient, therefore, I recommend you to try it!

7. Leads Tunnel
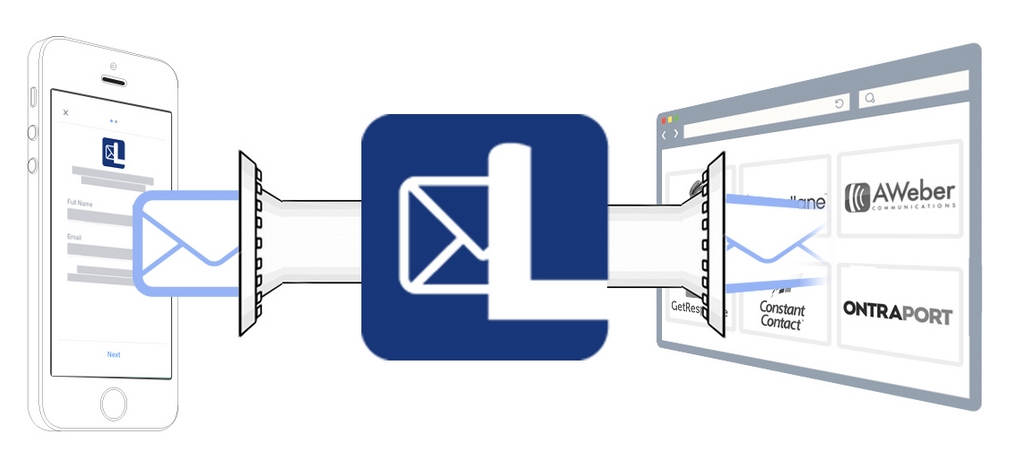
Leads Tunnel

As the name implies, this software has got a lead as it allows you to synchronize your Facebook leads to the email software of your choice. Yeah, you can automatically and instantly interact with the all the registered emails in the software you have chosen and share your ads with them.

Let’s imagine the process without leads tunnel! First, you would have to make a list of emails, and then use that list to market your business. Most of the times, people are reluctant in sharing their emails and regard it as a highly personal thing. Therefore, fetching email addresses in this circumstance would have been a great challenge for you. Thanks to leads tunnel that it is pretty simple to do it now!

8. Credi Response
Credi Response

Reach out directly to every single person who engages with your ad and express interest in your product at 100% inbox delivery. Imagine this anytime some comments on your Facebook page post they get a personal message right into their Facebook inbox automatically.

Credi Response is 100% Facebook compliant software that uses a new Facebook technology to monitor your Facebook pages and posts and send a direct message to those who leave a comment on your posts. The message pops right up on the screen with audio alert Facebook notification.

Run Facebook ads with credi response and maximize conversion using this amazing web based software.

9. ZipoGraphics
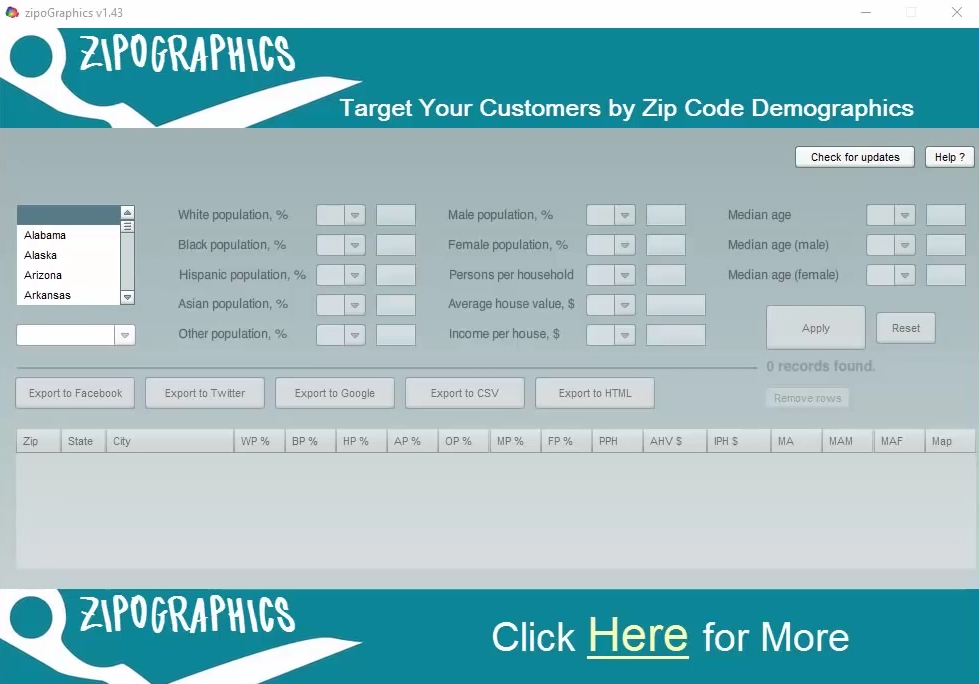
ZipoGraphics

Like Interest explorer, it took ten long years for professionals to design this software. Its stand out feature of is that it perfectly suits both the professionals and the newbies. It has the fastest and efficient algorithms that ensure fast speed and accuracy. It also kinda laser targets the audience for you as you can choose them demographically. It doesn’t only allow you to choose a specific country, but you can also select people of a certain city within the selected country. What is more, it allows you to target them on the basis of gender, age, background, income, race, and number of persons in a house.

10. The Campaign Maker
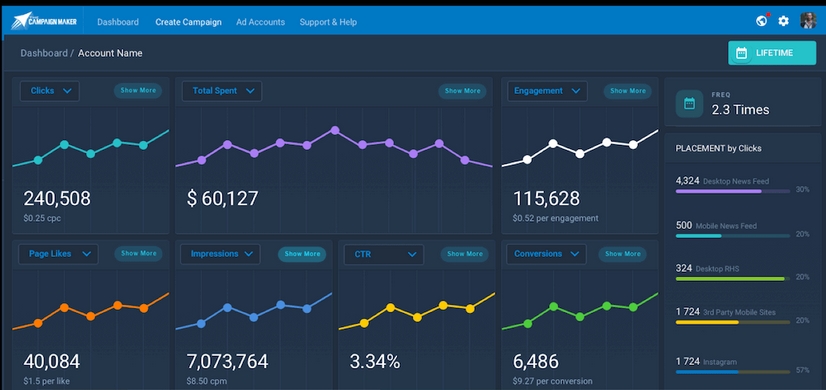
The Campaign Maker

Time is money, as they all say! And, it’s pretty much right. Being a Facebook marketer, you lack time even more and always want to speed up the process. Keeping this in mind, the designers of campaign maker have made a simple dashboard of this software. You don’t need to go through complicated steps as you can have the entire picture of your campaign within one glance. It’s TCM report has been loved by the users as it shows how your money has been utilized. This information is usually hidden by Facebook that campaign maker unveils for you. What is more, you can copy your successful campaign within a few clicks. Nothing could be better than this! You don’t have to go through the tedious process of making another campaign. As a result, you save your time and the process speeds up.

In a Nutshell

So, to master your skills at Facebook ad strategies, I advise you learn the above-mentioned tools. Every tool has its own specialty; therefore, you must know your requirements first and then chose the one that fits your needs. There are other tools in the market as well, but these are the best ones I have listed down for you. Did they help you in increasing the number of customers for your business?
Tagged : / / /

How to Create Push Notifications for Posts in WordPress

Push Notifications for Posts in WordPress.jpg

Did you just spend hours to write a new blog post for your target audience to read? Unfortunately, with tons of websites aiming for the same audience, that is not always the case. It can be a tough task to let people know about your new content and get them to read it.

You can let your visitors remain updated with whatever is new on your website by using push notifications for WordPress. Your audience remains informed about what’s new on your website when message is sent directly to people’s desktops or phones. Small reminders can go a long way and generate more traffic for your website and increase conversion rate.

What are Push Notifications?

While the technology of push notifications is nothing new for mobile apps but it is definitely new to send push notification from a WordPress site.

Push notifications for WordPress allow you to notify your subscribers regarding new things going on your website through a message. For instance, if you publish a new post, the notification is shown even if a subscriber is not on your website.

Therefore, push notifications is a perfect method for interacting with your audience even when they don’t visit your website.

How Can You Benefit by Using Push Notifications?

Push notifications are not just meant for e-commerce sites that have a variety of products to sell. Simple bloggers can also reap great advantages of using push notification as it informs their audience whenever a new post goes live. Here are some of the benefits of using push notifications:

Engage Directly with your Target Audience

You probably know how a mailing list works. Push notifications works in a similar fashion. When people have opted and shown their interest in your niche, they become your target audience. You need to keep in touch with them and interact with them so that they come back to your website.

Sending emails regarding your content is an extremely effective way of engaging your subscribers. When you try to engage your audience via email, you need them to open your mail which can become a challenge too as inbox can become too crowded.

Push notifications stand out in this regard and the message is displayed on your user’s mobile or computer. The notification doesn’t wait for the person to open and this way directly interacts with your audience.

Engage Directly with your Target Audience

Increase your Website Traffic

It doesn’t matter how well you have written your new post. People will only become interested if they are aware about it. When they don’t even know about it, how are they supposed to visit your website? Promoting your new blog post via push notification for WordPress can be the answer. It increases the traffic to your site and makes your new content discovered. Little reminders on a regular basis can keep people from slipping you out of their memory.

Improve your Sales

Through push notifications, you can promote new blog posts but that is not it. You can even promote your new products in case you have an e-commerce website. You can spread the word through push notifications regarding new product launches or sales.

Improve your Sales

Things to check out when selecting a push notification plugin?

There are tons of Push notifications plugins out there and they differ from each other. The features that you require will help you decide what will work best for you. Here are some of the things you should check before choosing a push notification plugin:

  • Check if offers customization.
  • Check if it offers analytics.
  • Check out he cost
  • Check if it is easy for you to use
  • Check if it requires your users to have an extra software in order to receive the notifications
  • Check out the devices and browsers it supports.

Recommended and most popular Push Notifications Plugins for WordPress.

  1. Push Connect Notify
  2. PUSHPAD
  3. One Signal
  4. Push Up Notifications
  5. Chrome Push Notifications
  6. PushEngage

How to Create Push Notifications for your WordPress Site

Setting push notifications for a WordPress site is not rocket science. Just like most of the things on WordPress, this can also be accomplished by the help of a plugin. There is a huge variety of WordPress plugin that can provide you with this service. They all work in a similar fashion.

As soon as you are done with the installation and setup of plugin, any user who visits your website for the first time will be encouraged to opt into the notifications. If they decide to receive push notifications, they will be able to see it whenever you send them notifications.

Push notification reach people’s devices in the form of message and if they happen to click it, it will take them to your website. Most plugins offer you a choice as to which content you would like to promote using push notification. People have the liberty to opt out any time they want.

Some Challenges with Using Push Notifications

Everything has its pros and cons and so does using push notifications. The major setback it comes with is actually making people opt in for receiving notifications. Plugins that come with customizable opt-in pages are a plus in this matter. They allow you to make a user friendly pop up that doesn’t irritate your visitors.  Letting your users choose the categories of posts for receiving push notifications is beneficial. Just understand that people don’t like their time wasted in their busy schedules. You might just lose a subscriber if you do.

Another challenge is that you need send out the right amount of push notifications. Sending too few can make people forget you totally and sending out too much can irritate them. This is the reason plugins that provide you with analytics can come in handy and let you keep a check on what your target audience is most convenient with. The analytics let you the number of notifications you sent, the number of people who read, the number of people who converted into loyal readers and other things.

Tagged : / / / / / / / /

5 Best WordPress Plugins for Showing Instagram Feed on Your Blog

Are you an Instagram lover who is in search of a way to connect your feed with other websites? Instagram is one of the fastest growing social networks throughout the globe. It is a great platform to share your pictures and videos to your friends who are added to your account. Due to the growing demand, Instagram integration to a WordPress website can greatly enhance the value and drive more traffic. If you wanna engage with the website users, try WordPress plugins to share your Instagram feed.

You may find several plugins, but to tell you the truth, finding a good one is easier said than done. That’s why I have listed down some of the good ones for you along with a brief description of each.

1) Instagram Slider Widget

nstagram Slider Widget

This plugin makes your picture look a lot better on mobile devices. It is one of the most responsive plugins that shows up to 20 pictures in a slideshow or grid layout. It allows you to adjust interval timings between each picture. What makes it even more interesting is the feature that automatically stores thumbnail images. So, the pictures are immediately loaded right after the initial display.

Installing this plugin is super easy; all you need to do is enter your Instagram credentials on the options given in the widget, and then customize settings where you can manage how often you need to upload images from Instagram.

2) WP Instagram Widget

WP Instagram Widget

The most attractive feature of this plugin is its simplicity as it shows a list of the recently uploaded Instagram photos of any user. This plugin doesn’t have many features to design the output; therefore, it is well-suited to those who prefer doing it personally. All it does is handling the mechanics of pictures that is what most of the users want. It only asks you for the Instagram username and the number of posts to configure your feed.

3) Instagram Feed WD

wd-instagram-feed

It provides you with both widget and its shortcut, and it is capable of configuring thumbnail size and the number of pictures you want to display. It also allows you to open each photo in a separate tab and write a description if you want to add. Just as above, it is a good choice for those who are good at styling the output themselves.

4) Instagram Feed

Instagram Feed

It allows you to display pictures from various Instagram accounts at a time in one stream. You can enter multiple user account credentials from which you want to share pictures. It is designed to format and present the pictures in the most attractive way. It is free to use so it gets directly installed to your WordPress directory. Also, there are a few options, through which, you can adjust how you want the image to be presented on the website.

5) Enjoy Instagram

Enjoy Instagram

Enjoy Instagram makes your experience enjoyable and fun as “how your image looks” is the main feature here. It is yet another famous responsive plugin that is optimized for mobile devices. There are two ways with which you can display your image: carousel format and grid. It also allows you to control the number of displayed pictures.

You can display photos through either widget or its shortcut, and it also supports the hashtags you add on your Instagram uploaded photos. Well, some users have reported the issue of slow display due to the local storing of images.


Tagged : / / /

How to Automate The Most Common and Critical Tasks on Your PC

Are you a busy person who never has enough time and forgets things pretty often?  Does using PC make you irksome because you can’t manage to multitask? Ellp is free automation software that simplifies tech-use for you. I have talked about IFTTT in my previous post and this tool is just like that for a desktop. The difference is it manages actions for you on your PC rather than focusing on online interaction. However, both of the apps automate your day. Stick around to know how Ellp works and eases things for you.

How to Automate The Most Common and Critical Tasks on Your PC

How Ellp Works?

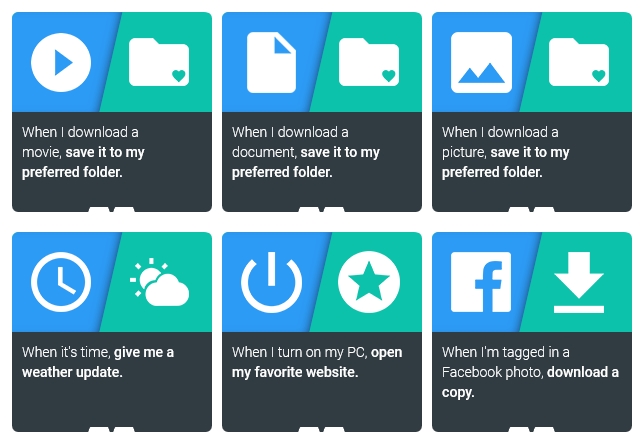
To be honest, multitasking is easier said than done. Ellp performs multiple functions that simplify PC usage for you. Basically, it is based on a “card system” and each card is assigned a certain task. Now, it’s up to you whether you want to keep all the cards activated or shut down those you don’t intend to use. You can see all the cards on the main overview and adjust the settings as per your needs. They are also stored in other places such as the Internet, Storage, Devices, and Schedule.

How Ellp Works

What Tasks Does Ellp Perform?

Now, let’s talk about each card separately.

Free Up Disk Space

The first card on the main overview says “Free Up Disk Space.” Once you have swiped and activated this card, it vacuums your system whenever it is crowded with unwanted files. By default, it is set up to 85%, which means it shows a pop-up whenever your PC’s storage reaches 85% and starts cleaning surplus. It works in the background and doesn’t irritate you with notifications and messages, other than a slight pop-up when needed.

Download Tagged Photos From Facebook

Don’t you love it when your friends tag you in memories and photos? You must want to keep them safe somewhere as a memento, right? However, most of you lack that amount of time to keep a record of such things. Let the second card of ellp activated and it will automatically download photos for you in which you are tagged in.

However, note that you have to keep logged in to your Facebook and allow the app to access your profile. Also, you have to assign a folder to the app where it would save the photos.

Block Duplicate File Download

This is the feature I admire the most! Doesn’t it happen a lot of times you keep on downloading the same file again and again upon your own ignorance? Urggghhh..!!!! This action results in clogging of your disk space and you don’t like it! The third card of ellp keeps the new one and deletes the older file automatically when you download the same file again; resulting in an unclogged disk drive.

Mute PC

Notifications and pop-up sounds are frustrating, especially when you are sleeping. Most of the time, you forget to turn off the sound and it disturbs you later. Navigate to the fourth card of ellp, activate it, and adjust the timings during which you don’t want to be disturbed by the sound of notifications, advertisements, and pop-ups.

Play Music

Some of us love to listen to the music while doing homework or writing on PC. You can flip the fifth card of ellp that says “Play Music” and select the music you want to listen. It will automatically play the selected option for you whenever you plug in any sound output like headphones or earphones. The options on the card include Netflix, YouTube, Vimeo, and others. However, keep in mind that ellp only recognizes the device through a USB port.

Open Your Favorite Website

It’s kinda ritual for most of us now to open Facebook, Twitter, Linkedin, and Google whenever we turn on our PC. If you want to save your time, adjust the settings of the sixth card of ellp and select the websites from the drop-down menu you like to visit upon turning on your system. Please, note that you can choose any website at all, apart from the ones mentioned.

Launch Skype Automatically

If you are a frequent Skype user, activate the card that reads “Launch Skype Automatically” and it will launch it for you right when you plug in the sound output. Connect with your friends right away, without wasting a minute!

Shut Down Your PC

The last card on ellp lets your PC shutdown, restart, or sleep at a certain given time. Just select from the given three options and timings as per desired and it will automatically do as it has been programmed.

That’s it! See, how your day is automated just by installing a simple app on your PC. Installing is as easy as any other software/app on your system. None of us can live without our PCs today, and something that automates it usage is surely a blessing!


Tagged : / / / /

5 Simple Tips to Promote Your YouTube Channel

Are you thinking about promoting your business through YouTube channel? You aren’t alone. YouTube is the leading video sharing website throughout the world and it has helped several businesses to flourish through its channels. To promote your business, you have to promote your YouTube channel. Don’t worry! You don’t have to be an expert to do so. There are simple tips that will increase your channel’s rating and you can earn a great deal out of it. But what are those tips? Have a look!

1) Make an Attractive Title

use-youtube-to-get-traffic-to-your-website-and-blog

An attractive title does wonders for your promotion. However, keep in mind that too lengthy and irrelevant titles bore searchers. Your title should reflect your video content in a way that the searcher gets a quick idea in mind what the video entails. Similarly, avoid using a lot of words in the title; keep it as precise as possible because no one has time to read wordy titles. For instance, if your video is about the tips that will help in promoting a YouTube channel, you should only write “ways to promote YouTube channel” as your title.

2) Use of Thumbnails

Use of Thumbnails

Thumbnails show good results in terms of channel promotion. It enhances your video making process and attracts viewers to like it after watching. However, you should have a good graphical sense while choosing a thumbnail. Keep viewers in mind while choosing it and make it visually attractive.

3) Write a Suitable Description and Tag with Keywords

create-a-web-tv-series

Since people are always running out of time, they usually read the short video description before watching. If it interests them, they go for it otherwise, they move to the next. Tips to write a description are same as those of making a title; keep it short and relevant. Avoid putting too much information and remain on point. Again, keep the demands of viewers in mind before writing and always put keywords in description.

Why is it important to add keywords? Google rating is the game of nothing but keywords. Correct keywords shoot up your position on the Google search engine and vice versa. First, learn which keywords will bring your rating up and then put them on.

Tags should be only one or two words. Again, take an example of the video title mentioned in the first step. For that video, your tags should be like YouTube, Promotion, Ratings, etc.

4) Share Your Video on Different Social Media Websites

Share Your Video on Different Social Media Websites

A struggle begins at home. Similarly, your promotion will also start with you. Once you are done uploading your video on YouTube, share it on your personal Facebook, Twitter, Snapchat, and Instagram profiles. No, it’s not blowing the trumpet, but it’s an effort you are doing to enhance your business. Ask your family, friends, and colleagues to watch and like your video. Having a few likes prior to someone’s visit creates a positive image of your business. Avoid delay in sharing because the more you delay, the more you lose the chances of promotion. There’s hell of a lot more competition in the market than you think. No one will wait around for your business to come up. So, be the first one to promote your work.

5) Carefully Edit Your Video

be-a-brand-using-youtube

The first draft is always full of errors. Don’t be overconfident on the video you have made. After completion, watch it yourself and see what changes it needs. Again, keep viewers in your mind since you aren’t making the video for yourself. Your main target is to attract customers and make them buy from you. Remove irrelevant parts and long pauses from your video. Check for distractions if there are any and get rid of them. Don’t rush uploading it on YouTube; take enough time to edit it and upload the error free version only.


Tagged : / / / /

How to Automate Your Business Through IFTTT

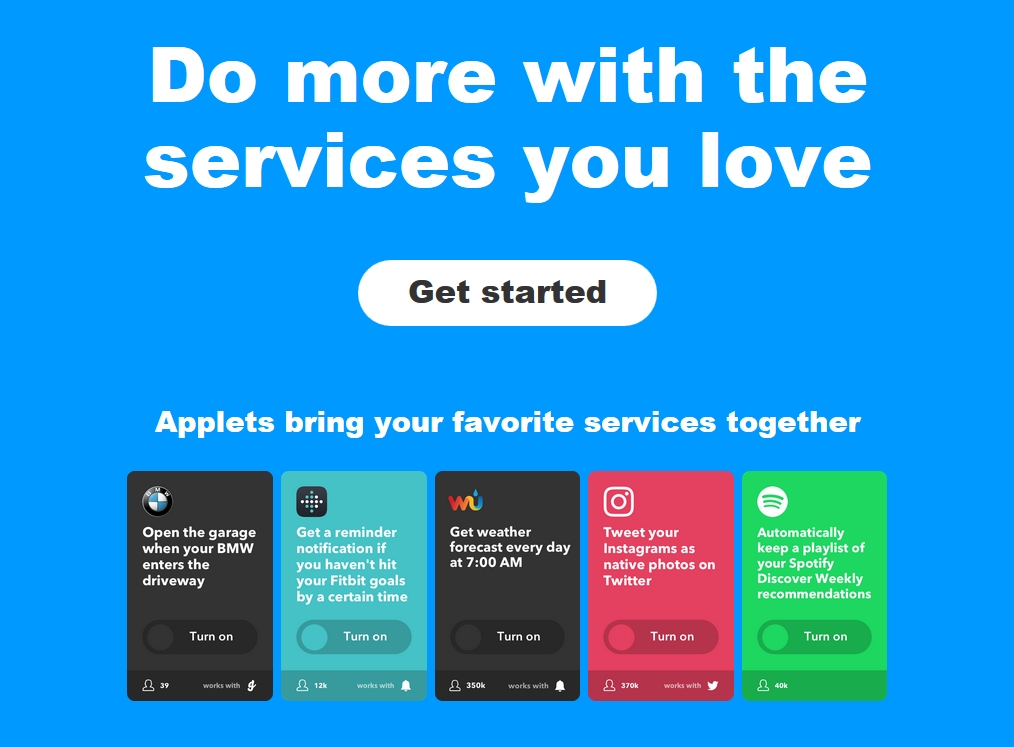
Are you looking for a way to connect different products and services to boost your business? IF This Then That, commonly known as IFTTT is a web tool to do so. Today, it is nearly impossible to run a successful business without being active online. The social media have got a hell of a lot more power than you think. The promotion and advertisement on social media is the most value nowadays. IFTTT connects different apps, products, and services together and eases things tenfold.

How to Automate Your Business Through IFTTT 2

How Does IFTTT Work?

Let’s explain the working of IFTTT through an example! You need to post on your twitter, Instagram, and Linkedin accounts something you just posted on Facebook. If you have access to IFTTT, you can connect all these apps together and it will automatically post it for you. That’s how it automates your day. Well, this is just a simple example. There’s a lot more you can do.

To have a better understanding of its working, have a look at the following steps

  • “Applets” is the term it uses to mention the connection between two services.
  • The first connection that is supposed to be connected with the rest is known as the “trigger” and the second one is called the “action.”
  • So, in the above example, the Facebook which is to be connected with the other apps is the trigger and the apps connected to Facebook (Twitter, Linkedin, and Instagram) are the actions.

How to Automate Your Business Through IFTTT

How to Use IFTTT Social Media Applets?
The most amazing fact about IFTTT is that it’s free. What else do you need when you can automate your day at free of cost? Let’s talk about how social media applets work.
  • IFTTT keeps your Facebook and Twitter profiles connected via syncing. It reduces your workload while simultaneously increasing your business. With this social media applet, when you upload your Facebook profile, it gets automatically updated on Twitter.
  • Just like your Facebook picture, your Instagram posts can also be uploaded on twitter via an option “share on twitter.” However, note that anything that is posted from Instagram to twitter appears as a link.
  • The most exciting feature is the applet that connects your twitter hashtag to the Google spreadsheet. When you tweet anything as a hashtag (let’s say you promoted your company’s name or the new product you are about to launch), it automatically gets shared on your Google spreadsheet.
  • You can also send live twitter updates to a channel. With this applet, you can send your twitter updates, anything from recent posts to a hashtag, to any slack channel you want.

How to Use IFTTT Campaign Management Applets?

Now, moving on to the ways of managing campaigns through IFTTT, which is yet another amazing feature.

  • While doing marketing such as planning a new MailChimp campaign, it is healthy for your business to keep people updated. When you plan a MailChimp campaign, IFTTT uses an applete and automatically updates your schedule in the Google calendar.
  • You can also sync social media buffer posts to the Google calendar to enhance your campaigning. I have already shed enough light on the importance of social media in terms of promotion and advertisement. Same is true for campaigning.
  • Now, let’s talk about the most important applet! All the businessmen are well aware of the importance of stats and calculations. If you need to keep your business balanced, it must be measured accurately. IFTTT also eases this burden for you by syncing the stats of a MailChimp campaign to the Google Spreadsheet. It gets easier for you to see the important information such as the open rates and clicks.

In a Nutshell

IFTTT isn’t just a web tool, but a way to ease your business tasks. While doing a business, you face time constraints and it gets difficult for you to be active in the Internet world. This tool was developed to automate your business. It works like an automatic car where you just have to sit and handle the steering; the rest will be handled by the tool itself.

Tagged : / / /

10 Silliest and Controversial Apple Apps Banned from iTunes

Owning the world famous apple iPhone is everyone’s dream. Apart from its catchy features, using apple apps is one of the most important reasons of owning iPhones. You can buy apps for anything at all, from losing weight to finding recipes or even for the prices of the latest cars. Apple has made our lives a hell of a lot easier than it was in the past. According to the last year’s statistics, apple offered more than 500,000 apps, out of which, iPhonies downloaded 100 million apps from the iTunes.

However, there are several apps that were banned from the apple store due to different reasons including sexually offensive, political concerns, and too partisan. Stick around to know the ten ridiculous iPhones apps that were shut down.

1. Beauty Meter

beauty meter

Reason: Sexually Offensive

This app was released for fun where users could upload their pictures for reviews and feedback from other app users. The critiques were given on face, body, or clothes. The person uploading the picture was rewarded from 1 to 5 stars, depending on how good or bad the picture was. It went fine in the beginning, but when a nude picture of a 15-year-old girl was spotted with 5,000 rates, Apple closed this app forever.

2. iBoobs

iBoobs banned app

Reason: Sexually Offensive

The most pathetic app Apple has ever introduced was iBoobs where women used to upload pictures of their breasts that were rated according to their gravity, mass, spring, firm, and back. It created havoc in many countries since it was easily accessible for the teenage girls, too. It couldn’t last long and was banned for promoting the sexual trend.

3. I am Rich

I am Rich banned app

Reason: Unknown

Some people dream to be rich while others desire only to appear rich. This app did nothing except showing a radiant red diamond on the phone’s screen that looked real. The app was worth $999.9 and don’t be surprised that eight people (six from the United States and two from Europe) actually bought this expensive ploy, dividing the money into $5,600 for the app developer and the remaining for Apple.

4. Me So Holy

Me So Holy banned app

Reason: Religious Concerns

The religious groups around the world came down hard on Apple with the release of this app. For me it was stupid of Apple, to be honest! What’s stupider than putting your head on the holy figures of different religions? It wasn’t fun of course and enraged almost all the religious groups because it mocked them all. Soon after the harsh criticism, Apple accepted it as objectionable content and banned it.

5. Herb Converter

Herb Converter banned app

Reason: Narcotics

It made the weed-takers and dealers to calculate every ounce of weed and convert them into grams. It helped sellers in their business dealings and consumers to know the amount they are consuming. The actual reason of banning was the unavailability of important features such as marijuana availability and prices. It could be improved, but Apple decided to ban it after the frequent complaints of stoners.

6. Prohibition: Dope War 2

Prohibition Dope War 2

Reason: Narcotics

All the oldies must know about the 1980s game, Drug Wars. This app was actually a modern version of that game and it was fun to play, too. Once downloaded, the user had to collect as much money as possible within 30 days through narcotics dealings. Apple realized after its launch that the title was too blunt to release in the market, and replaced the name with Candy Wars where the drug was substituted with candies.

7. Slash

Slash banned app

Reason: Offensive

This app was harmless and inoffensive, but what happened after its release took everyone’s breath away. The featured photo of this app was a knife and it actually played this crazy theme when users mimicked the stabbing action with their phones. The app was quickly shut down by Apple when some kids were found stabbing in U.K. Yeah, it seems crazy, but I bet you would end up doing the same if you had used this app.

8. Obama Trampoline

Obama Trampoline banned apps

Reason: Politician’s Defamation

Even though this app was nasty, it was cool to play around. The user was allowed to choose one politician out of the 18 given. It also featured the bottomless caricature of Bill Clinton that was pretty much offensive. The user had to bounce him/her off the Oval Office (trampoline). The target was to pop the balloons floating in the Oval Office with the head of the figure chosen. The app was blocked by Apple, given the reason of public figure’s defamation.

9. Puff

Puff banned app

Reason: Sexually Offensive

It’s actually sad to know Apple has launched a number of sexual apps in the past. There also came a point when people started criticizing Apple for this reason, and the release of app Puff was one of those times. It featured a beautiful Japanese girl and the user could actually peek into her skirts by blowing into the microphone. The same could be done by swiping the screen rapidly. If you blew harder, the girl could shriek, too.

10. Baby Shaker

Baby Shaker banned app

Reason: Infanticide Promotion

It was a nasty idea to stop the baby on screen from crying by rigorously shaking your phone until the two prominent red marks appear on eyes. It could harm the phone and the child protection groups showed severe anger and expressed extreme disapproval over the release of this app. It didn’t take long for Apple to throw this app into the waste bin.

Tagged : / / /

6 Effective List Building WordPress Plugins To Grow Your Email List

Every website owner’s goal is to bring more traffic than there already is. We sure as hell you have already tried various means for this purpose. In this article, I am gonna tell you about the List Building WordPress Plugins to increase the growth of your email list. The successful bloggers and internet marketers give positive reviews about email list and find it one of the most effective ways of bringing people back to your site and generate leads or sales. Although there are several list building WordPress Plugins, but we have summed up for you the six best of all.

Optin Monster

Optin Monster

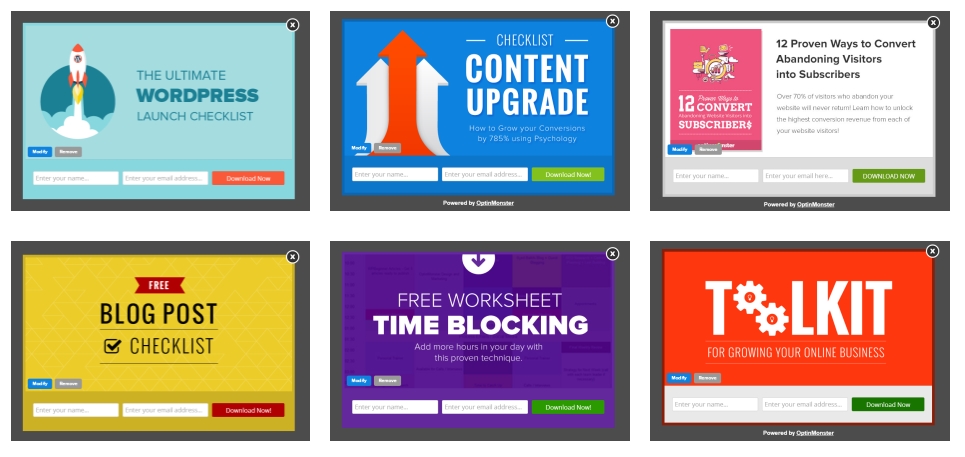
Are you a beginner in the website development world and looking for a simpler yet stylish plugin? Optin Monster should be your choice then. Everything here is at your fingertips; the built-in editor designs your forms in only a few minutes. Also, you will see quick popups that give you an opportunity to convert the left visitors. All you need to do is categorize your customers and use those pop-ups to capture emails.

It doesn’t end here! There is an optional two-step A/B testing, the results of which take you to a separate screen to look for email addresses. The price of Optin Monster starts from $49/year.


WP Subscribe Pro

WP Subscribe Pro

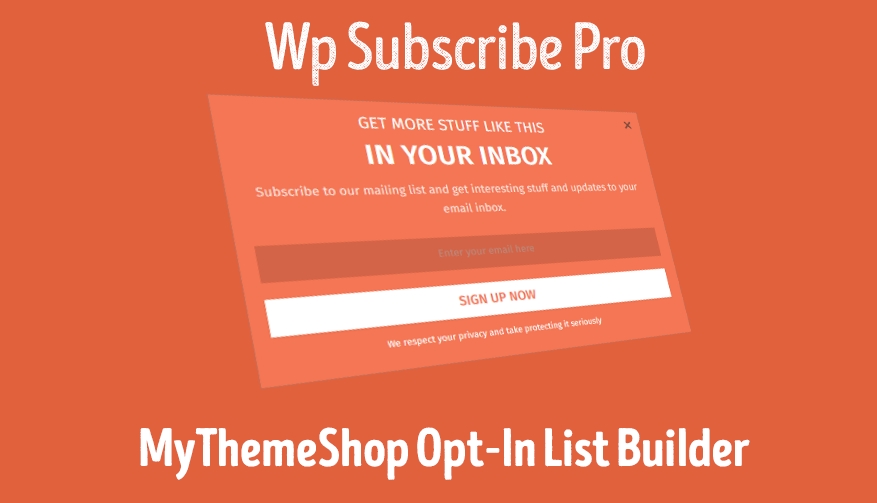
Well, you face a hell of financial constraints when you start a business, and the same is true with starting a WordPress website. The WP Subscribe Pro costs only $29 and offers several features to grow your visitors. What else do you need when you can have a great quality within your limited budget? The eye-catching designs and beautiful colors serve as icing on the cake for attracting visitors. The pop-up subscribe boxes are more preferable, but you can find impressive results with the pop-up animations and triggers as well.

What are the additional features of WP Subscribe Pro that make it unique? Have a look.

  • The amazing Cookie flushing is a unique feature of WP Subscribe Pro that helps you to wipe off the tracking so you can limit the targeting of customers and stop those you want to avoid.
  • This simple plugin has an option of customer coding with HTML that is yet another amazing feature to enhance your design. Also, there are shortcodes that take only a few seconds to spread your form through the entire website.


Popup Domination

Popup Domination

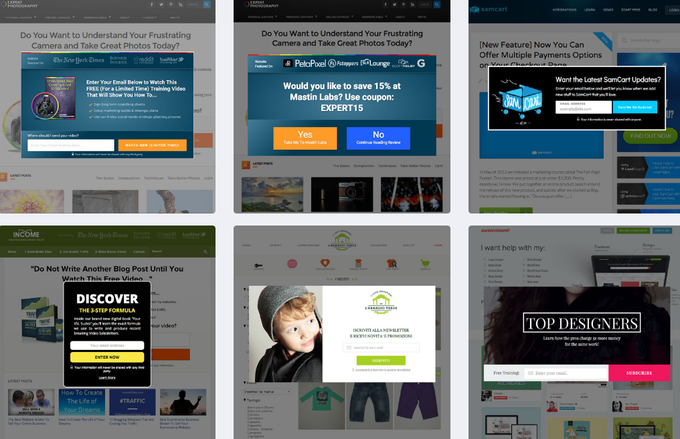
It is also a cheap plugin that offers some nice templates and once you opt it, you will find the support team quite helpful. Even though it isn’t much preferable, the force subscribers, page specific pop-ups, and super fast loading are the features that strengthen its position in the market. Since the use of mobile phones is common nowadays, the responsive designs offered by Pop Domination are pretty useful. It also guides its users regarding whether to stay or leave with its entry and exit pop-ups. All the designs are tested and proved and are available to enhance your branding needs.


Thrive Leads

Thrive Leads

I have read surprising reviews of Thrive Leads. Most of the website builders have found it the best plugin because it is mobile-friendly, makes your site looks great, and have amazing features such as layout options and page builders. Let’s have a look at the features Thrive Themes offers

  • The page builder feature makes website creation ten times easier than the other plugins.
  • The themes are conversion focused, which means they are designed to sell more.
  • It enables you to remove/delete several plugins with a bundle of available features.
  • The A/B tested creation of Optin forms and landing pages within minutes.


WP Optin Boxes

WP Optin Boxes

It is so far the best and most effective way to grow your email list. It adds a feature box- a wide opt-in box for emails- to the homepage of your website. It encourages people to sign up to your website, which, in turn, brings more traffic. It has the highest opt-in rates and more emails than any other form on your site.


VideoPal

VideoPal Demo

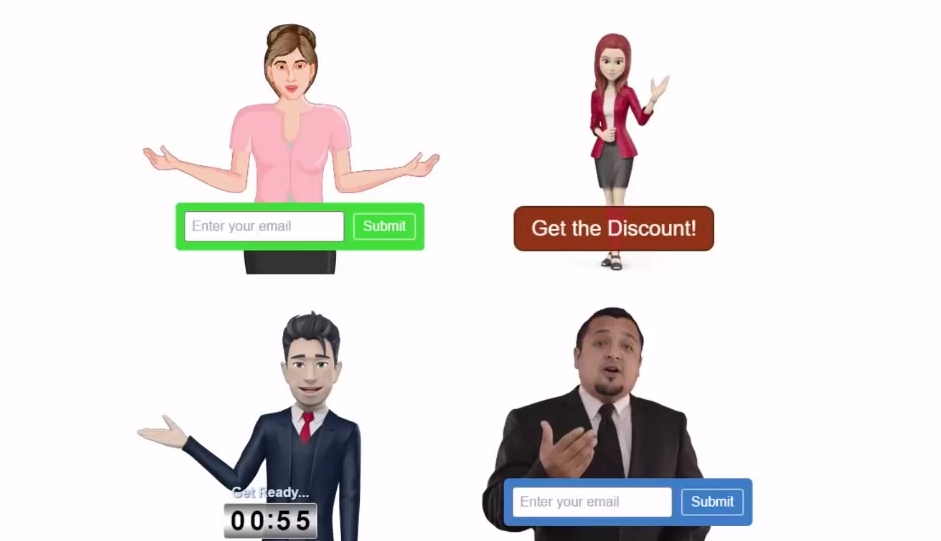
VideoPal, its a cutting edge talking video avatar web-based application for website with human like text to speech voice technology. It interact with site visitors in ways that pop-ups, widgets, opt-in and other web conversion tools simply can’t. It allows you to reach out to your visitors and get their attention. Then, it helps them to take a certain desired action like get on your list, click a buy button, generate leads and more.

Choose from a wide selection of male or female avatars (live, 2D and 3D-animated) as well as 47 different voices, accents and over 24 languages. You can even use your own video and/or voice-overs to create your avatars and gives you the power to custom-create an avatar that will connect with your sites’ audiences.

Tagged : / / / /

Why ThemeForest isn’t as great as it looks?

Why ThemeForest isn’t As Great As It Looks

Are you thinking of earning more bucks by selling your WordPress theme on ThemeForest? Well, it’s true that several people have done so and they are making a great deal out of it, but there are a few things you need to know. The owner of the template marketplace, Envato is the founder of ThemeForest. If you look at the statistical figures of ThemeForest’s selling category, you will find WordPress on top of that. It shows it has been successful so far, but now, people have discovered a few issues that have damaged Envato’s reputation in the marketplace.

What is ThemeForest?

Some of you might be unaware of ThemeForest. It is a huge market for website designing. Either it’s the off-page SEO or on-page management systems, ThemeForest provides services for both. To the all WordPress users, it offers a wide range of themes starting from general to niche.

What are the Issues with ThemeForest?

What’s the issue if it’s so great you must think? Well, it isn’t as cool as it sounds. Here are a few disadvantages of selling your Word press theme on ThemeForest.

1) Theme-Lock

The major problem that ceased most of the authors from choosing ThemeForest is Theme Lock. Basically, the more features a website holds, the more it earns and gets marketed the most. The authors compete on the basis of number of themes their website have. However, when you built more and more features to your website, ThemeLock start happening. Now, here comes a question that what is ThemeLock? It’s like hanging a mobile phone. Well, not exactly hanging but somewhat like that. When a WordPress author adds features to his or her website incessantly, there comes a point when he or she gets unable to change the theme unless he or she gets back to the previous theme codes. This is known as Theme Lock.

2) Low-Quality Theme Codes

Coding is everything when you are working on WordPress, and unfortunately, ThemeForest doesn’t provide high-quality market themes that could cope with the latest practices.

One of the common market practices is to separate plugins and theme. Now, the problem with ThemeForest is that it is packed together with several themes or the plugins are included in the themes itself.

The second one is the security issue. There is a caution for you to avoid getting attracted to cheap offers displayed on ThemeForest. According to the report of WP Tavern, the Slider Revolution security problem has affected several sellers on ThemeForest.

Long Term Effects

The aforementioned problems might seem normal technical errors while working on a website. However, when these issues grow, things get out of your hand. Can you imagine working on a ThemeForest theme and after a month or two, you either face security issues or run into troubles while switching your site to another theme? Well, how come these issues get ignored so easily? It’s because consumers treat everything from software to themes and plugins as WordPress. So, anything that goes wrong, it’s a WordPress problem for them.

What are the ThemeForest Alternatives?

After reading what I just wrote, you must be thinking about some alternatives. Well, it’s obvious. Have a look at three recommended alternatives.

Genesis Framework, as the name indicates, is built on child themes. Even though it is easy to work with, you need to learn some codes, especially for filters and actions.

If you want to get rid of coding and just enjoy working, go for Headway. It is an awesome option for beginners.

Elegant Themes is the best option for those who want simple yet graceful themes. It is also a good option for beginners, and Divi is its most popular and easiest theme among all.

Tagged : / /

How to make huge money using Amazon and drop shipping

How can you make huge money monthly selling on Amazon and drop shipping

Everyone dreams of becoming rich, but only a few succeed. Have you ever thought about drop shipping via Amazon, but the secrets to getting there are vague? In this article, we will tell you how to earn a big chunk of money by using Amazon drop shipping and leverage its power. Believe it or not, you can earn up to $15,000 in six to twelve months. We have prepared for you a simple four-step guide, but it needs patience and work. Remember, you can’t be a millionaire overnight and only practice makes a man perfect. It may seem a tedious process, but month after month, you will be leveraged.

Create Your Account

The first step is to make an account on Amazon. Since you are here to sell, make a seller account which is further divided into the individual and professional account types. For the new sellers, things get twice easier with an individual account. First, because it’s free, and second, it only asks to pay for the items you will sell. So, what’s the difference between the two? Well, the professional account is like a premium account for which you have to pay $40/month to enjoy the additional features. However, a common aspect is that a list of unlimited products can be posted through both the accounts.

Search for Low-Cost Drop shippers

Now, here comes the secret we were talking about. The successful Amazon sellers look for cheap drop shipping suppliers to reduce their delivery cost. There are multiple suppliers available, but the best ones are hard to find. Have a look at the possible options.

• worldwidebrands.com
• doba.com
• salehoo.com
• inventorysource.com
• wholesalecentral.com

All of these are cheap sources, but we suggest you go for Salehoo. It is the most reliable and trusted source, and the most successful sellers on Amazon use it. The reviews of existing sellers enhance one’s trust in their service. Unlike Salehoo, most of the cheap suppliers have limited marketing budgets, so they reduce the cost of their items to balance their sales. So, subscribe to Salehoo today and boost your business.

Research Supplier Catalog

Once you have found a cheap supplier, you have got to look into the supplier catalog for low-cost and high-selling items that can be shipped. What earns you a handsome amount of profit is the difference between the supplier and Amazon cost. Look into the prices of the items the Salehoo suppliers are offering and the cost of the same product on Amazon. You will find a huge difference. The Amazon price is usually twice that of Salehoo. This is how Amazon drop shipping increases your bank balance.

Prepare the In-Dept Description for Amazon Posting

The last step tests your marketing skills. After finding the product to drop ship, you have to write an SEO-optimized title and in-depth description that could rank high on Amazon posting. Keep in mind that you clearly describe your policies and details of the products. As a beginner, asking your friends and acquaintances to buy from you and review lately, can serve as an icing on the cake.

Tagged : / /